Introduction:
In this document I quote the Petals Webconsole use cases and present these in different scenarios.
All scenarios can be taken into account as tutorials by describing correct interactions which must be
performed between user and the Webconsole.
Administration use cases:
|
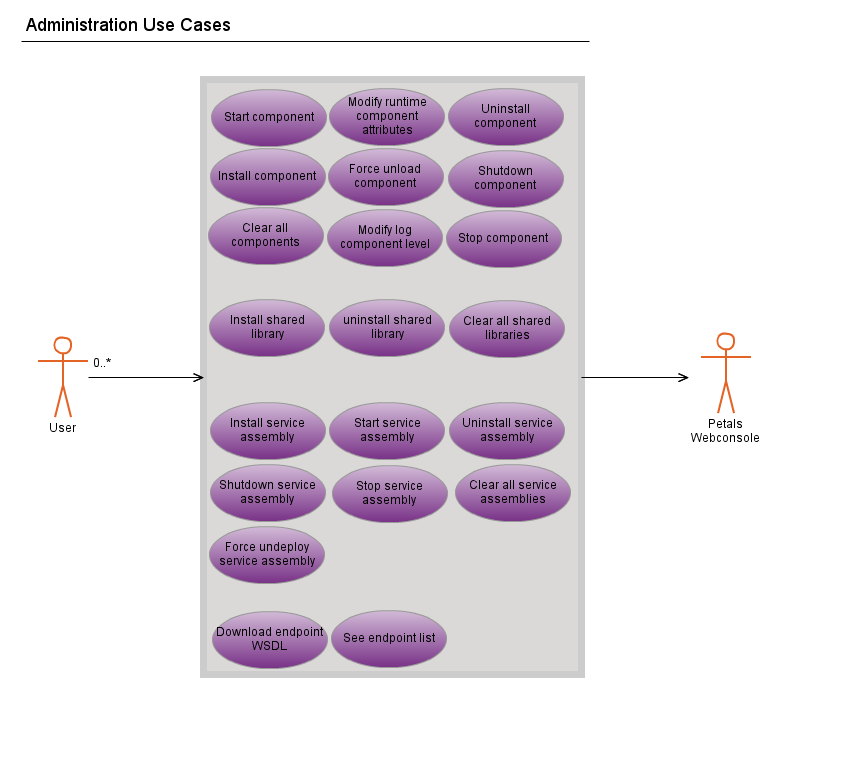
I propose to you a simple scenario where you'll learn to install the petals-se-pojo and
one service assembly associated to this component, next install one shared library and
to finish how to uninstall these previous artifacts in order to return to a clean Petals ESB
node.
In first part I present to you a small tutorial/scenario about component management which present
the differents use cases about component installation, component start action, how to edit
runtime component attributes, ect ...
After the first part the scenario will tend towards service assembly management, and to finish
one part of shared library management.
For the following scenario the petals-se-pojo will be used, the first use case is "install component"
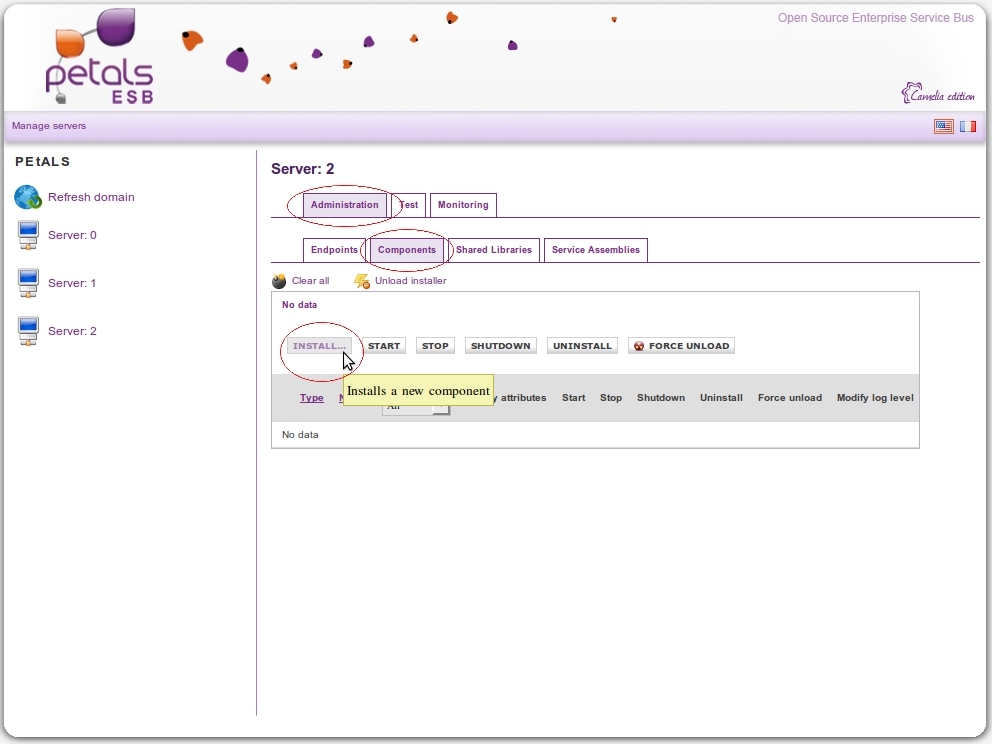
Install component steps:
To access to the component installation functionality you need select the server where you want to install
the component (here server 2), go to administration tab, next components tab and to finish click on install... button
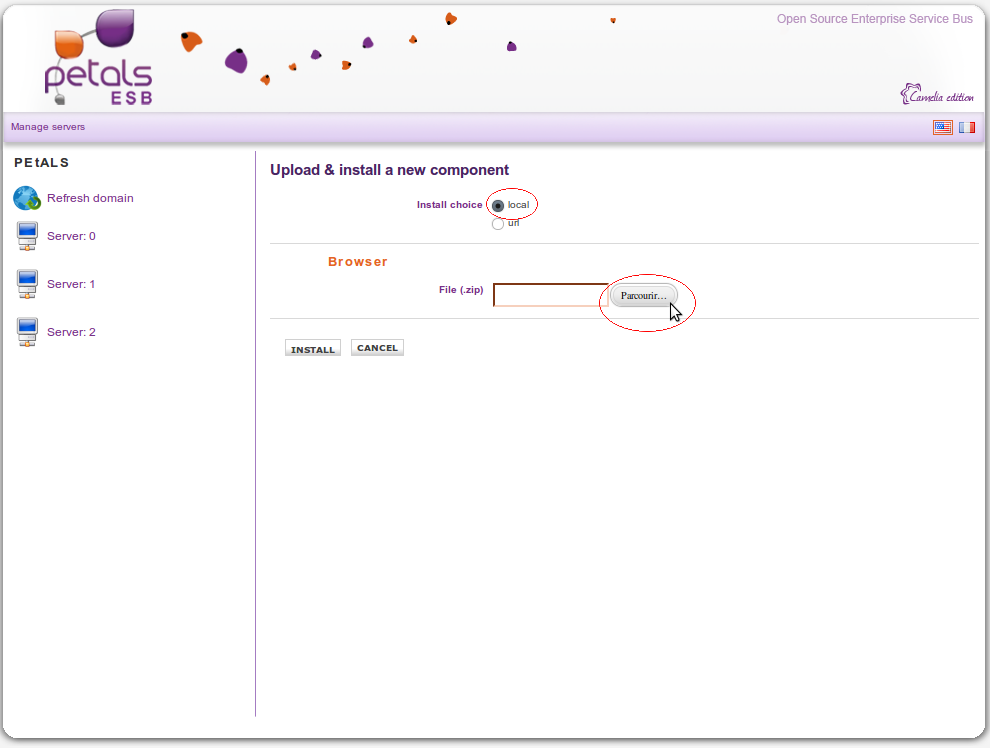
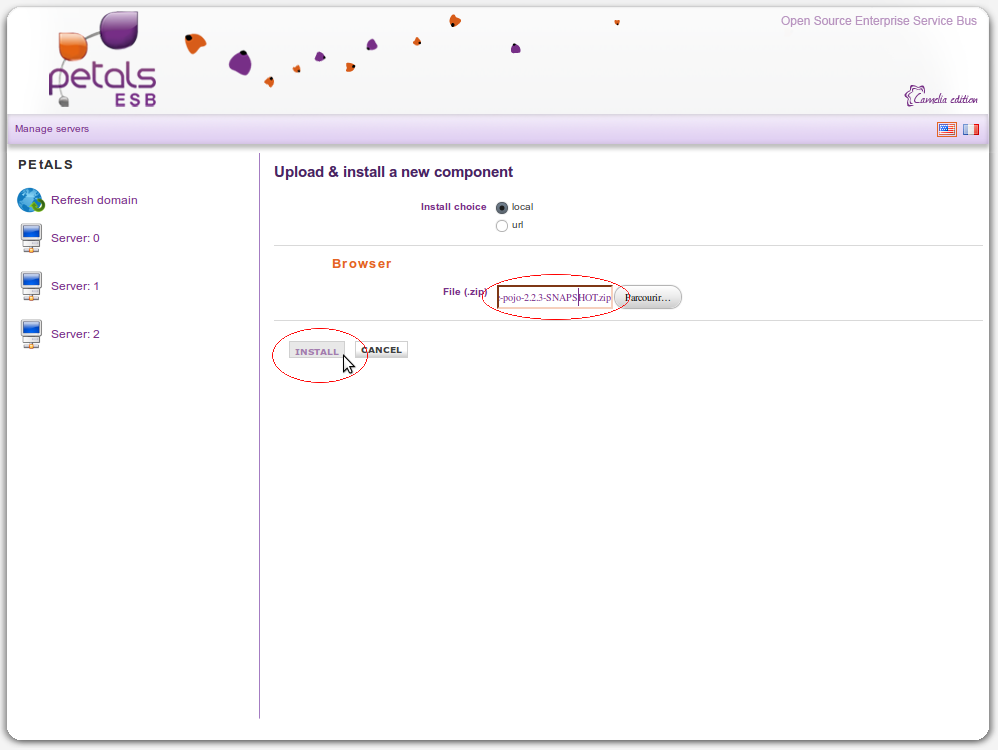
The Webconsole display to you the component installation page, in this page (for our scenario) you need to select local
for the installation type (because we assume that the component to install is located locally on our computer) and click on Parcourir... button
in order to search the component in your computer directories.
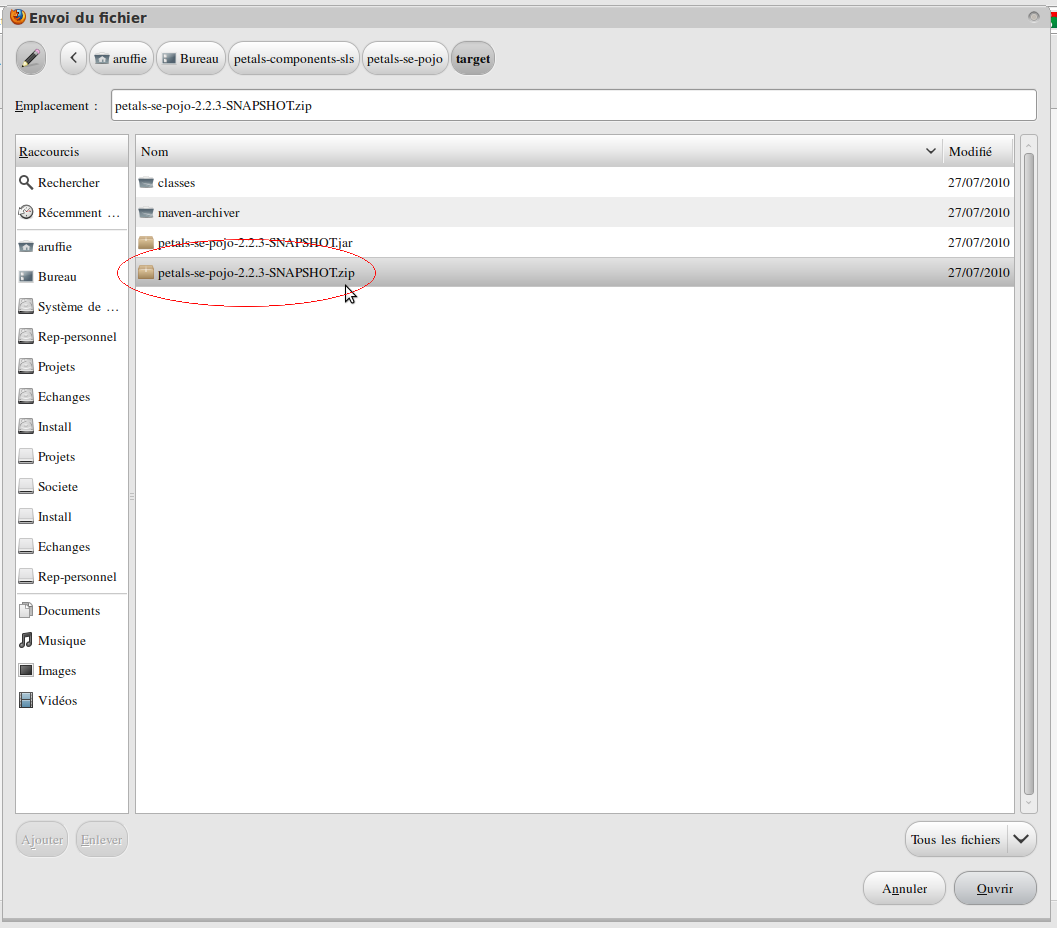
Select the petals-se-pojo component zip archive.
After returning to the component installation page click on install button.
The Webconsole load the component installer on the Petals ESB node in order to
return the installation attributes which can be configured during the component
installation.
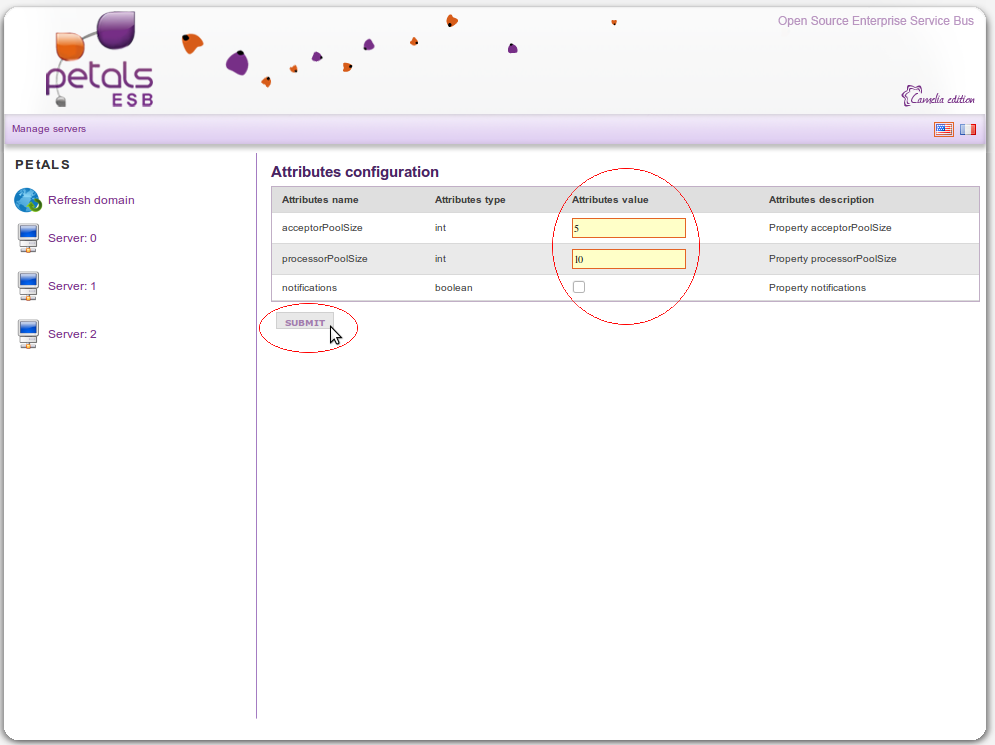
The previous displaying installation attributes are specific to petals-se-pojo component, other
component may have different attributes. You can change attributes values, after that you
need to click on submit button in order to terminate component process installation.
Now you see the final result of installation component step, the petals-se-pojo component is
installed but shutdown. In the next step we will see how to start it.

Start component steps:
In this part we see how to start the previous installed petals-se-pojo component, don't worry it's very simple !
To start a component it must be in shutdown or stopped state otherwise its state is incorrect to the action you want
to perform.
To start a one component you only need to click on the link start button on the component row

As the result you can see the following state changement on the petals-se-pojo row (in component table)

Now for our scenario we will install one service assembly for the pojo component
Install service assembly steps:
For now and in order to follow our scenario we will install one service assembly on the previous installed
petals-se-pojo component. For that you need to go in the service assembly tab (of administration Webconsole
part), this tab allows you to perform several management action on service assemblies, it's here where we
find the installation functionality.
| Linked state between component and service assembly Quick reminder: In order to install one service assembly, the dedicate component must have started or stopped state. If you need to shutdown a component all these sevice assemblies must be in shutdown state. And to uninstall one component all associated service assemblies must be uninstalled in first. |

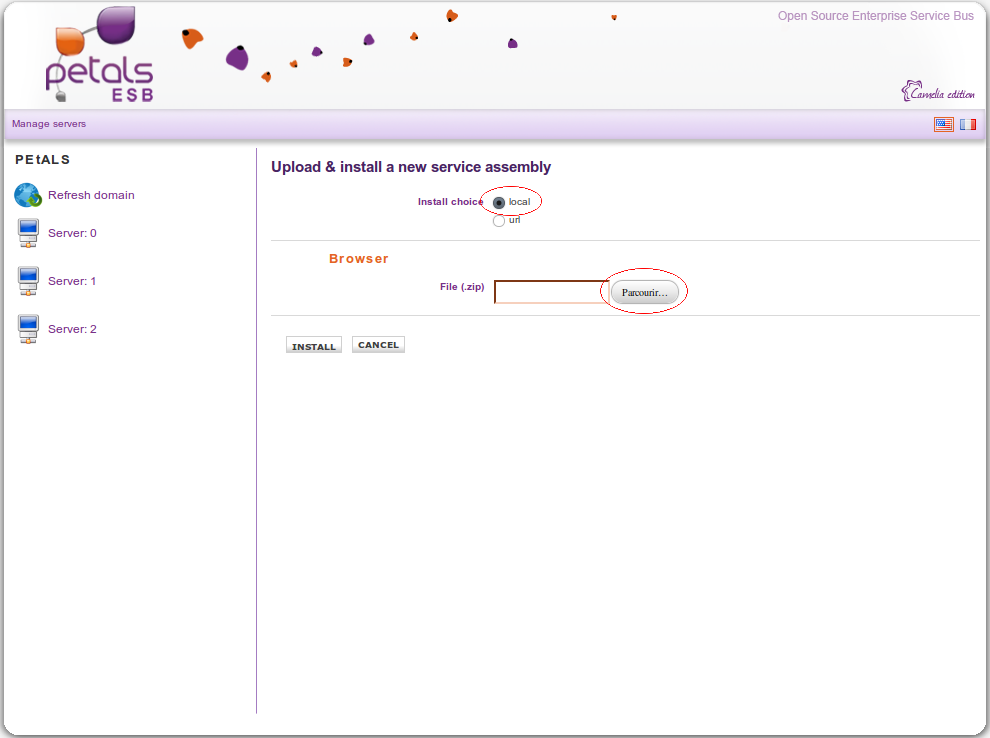
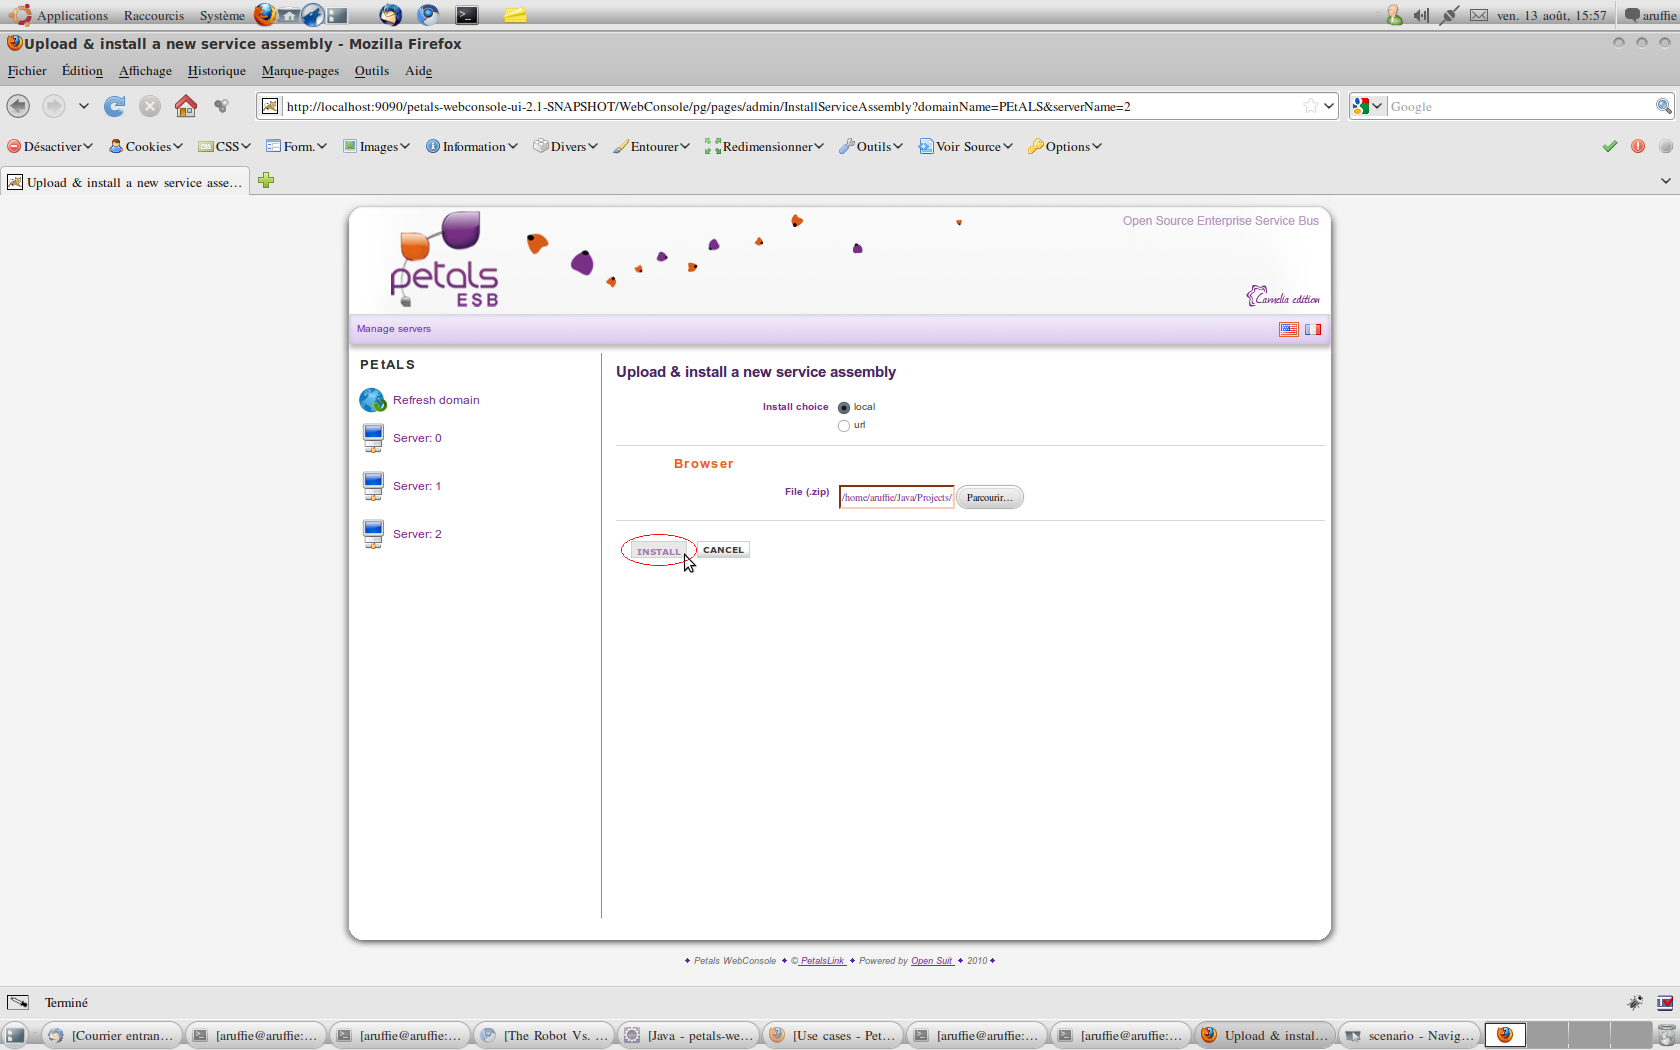
Next the Webconsole display to you the installation service assembly page. In this page you need to select
local type installation, because in our scenario the pojo service assembly is located on our computer.
After that you need to click on Parcourir... button in order to select the service assembly in your computer
directories.
Your web navigator provide to you an interface for search the pojo service assembly archive
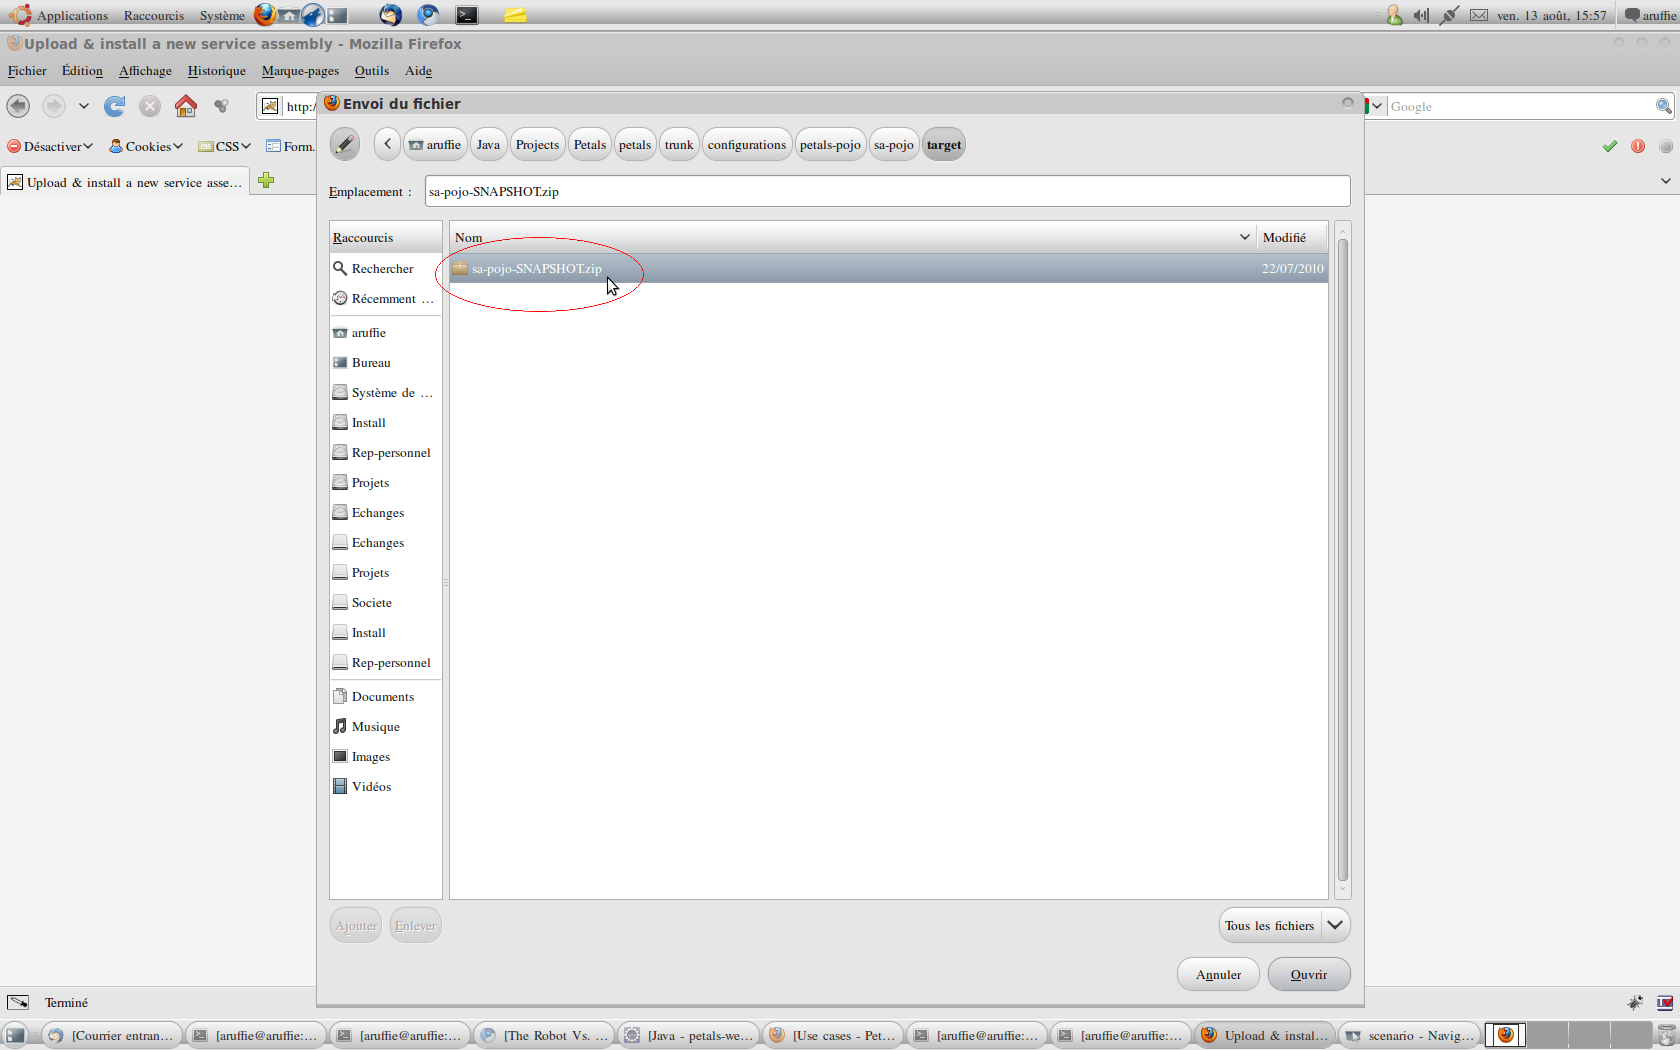
When the archive is selected you only need to click on install button to perform the pojo
service assembly installation
After the Webconsole provide the pojo service assembly to the selected Petals ESB node,
the node try to install this service assembly. If the installation is correctly performed the following
message will be displayed

This screen informs you that all service units of the service assembly was correctly installed, but why ?
Because if your service assembly contains several service units, certain may misfired during the installation
process. If one or several service units wasn't correctly installed the Petals Webconsole will warn you. In
both cases you need to click on continue button to return to the service assemblies management table.
After returning to service assemblies management table, you can see the previous installed pojo service
assembly but, on its dedicated row its state is shutdown.
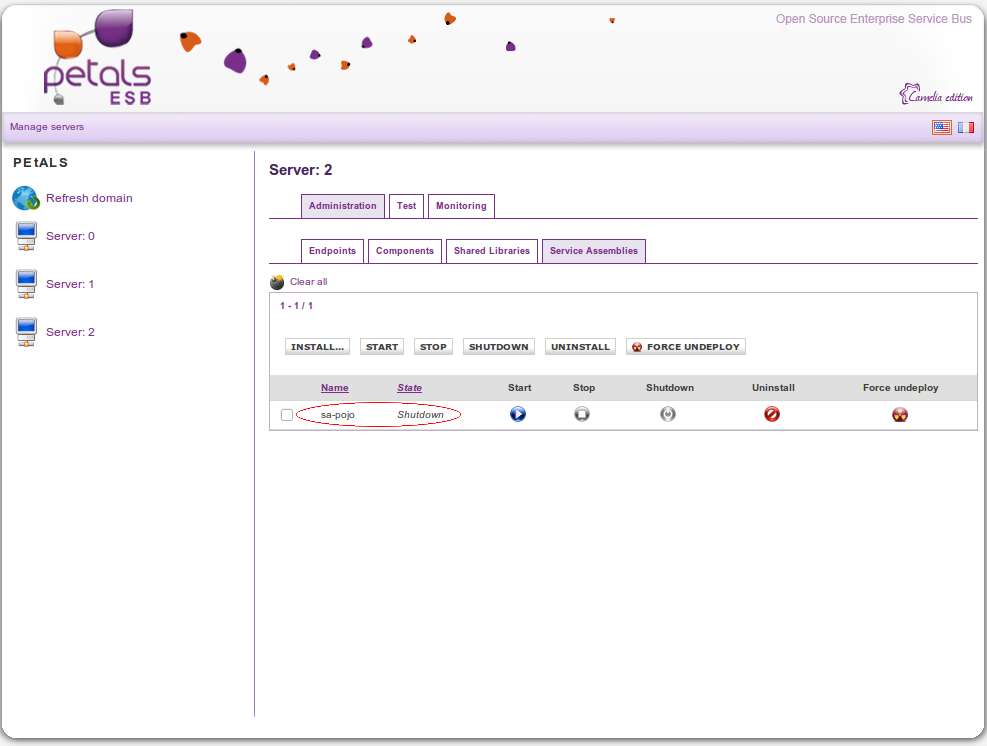
The next step in our scenario will start this previous service assembly.
Start service assembly steps:
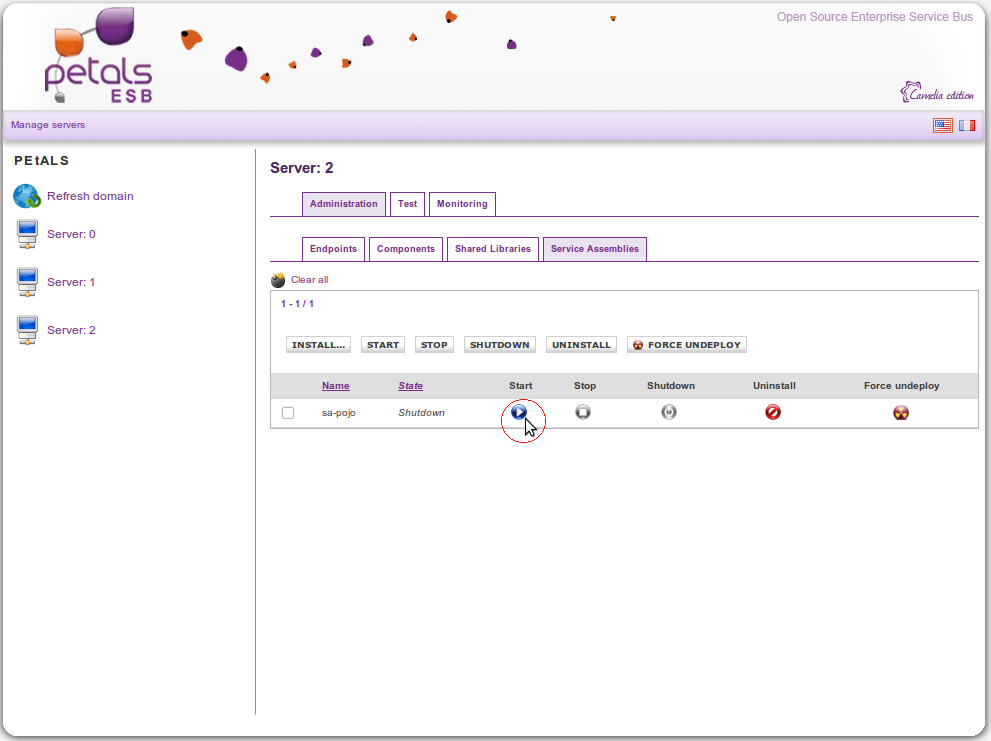
In this step we will see how to start the previous installed pojo service assembly (currently in shutdown state)
don't worry about that it's very simple to do, because you just need one click on the right button ![]()
To start an installed service assembly you just need to click on the associated start button displayed on its row
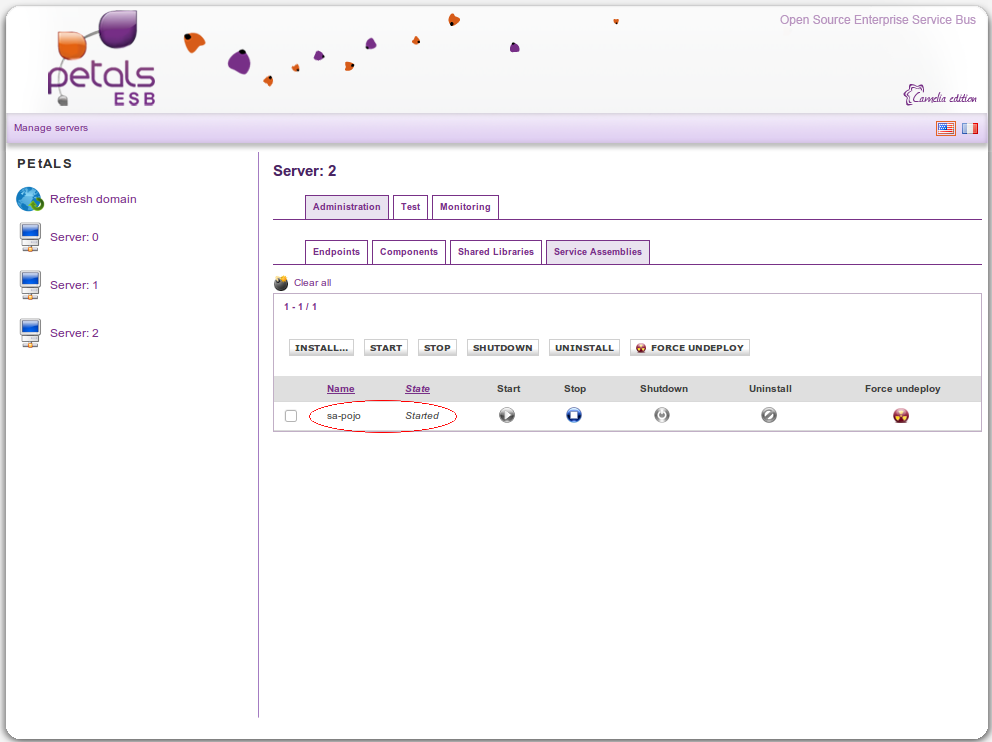
If the start process is correctly performed the service assembly management table is normally redisplayed, but with
the changed state for pojo component to started, otherwise it's an error occurred during the starting process ...
Now that we have seen how to install a component and its linked service assembly, it only remains for us in the
administration tab, to see how to install a shared library.
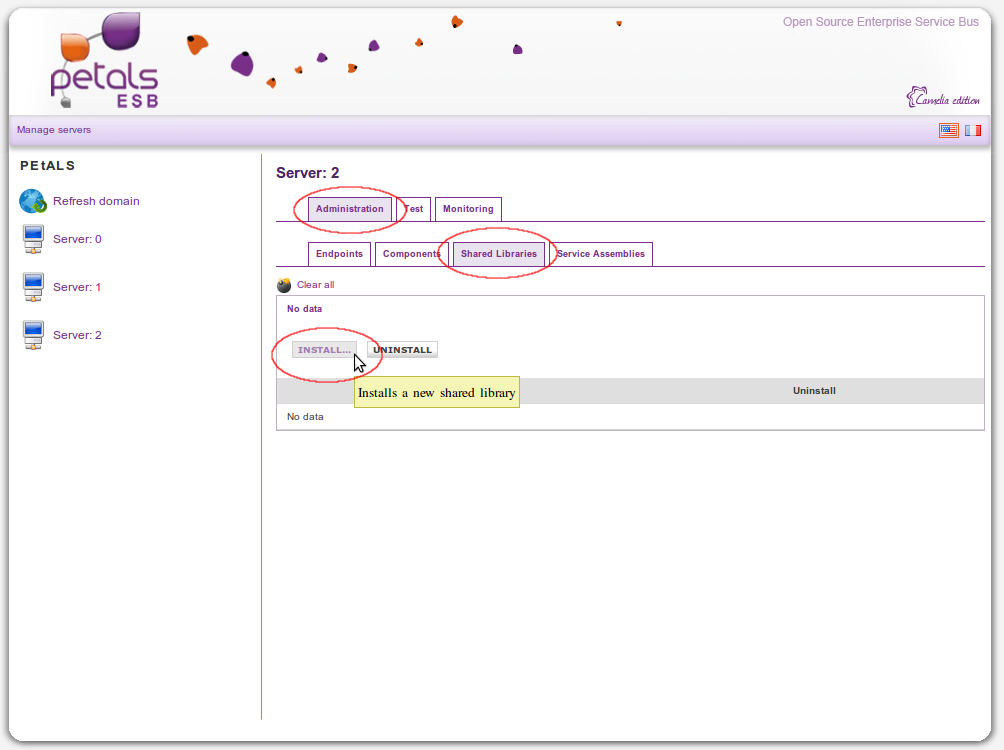
Install shared library steps:
In this part we'll just see how to install one shared library.
In order to perform one shared library installation "Rendez-vous" in Administration tab and in the sub tab named
Shared Libraries. For install a shared library form the shared libraries management tab you just need to click on
install... button, and the Petals Webconsole will return you to the shared library installation page.
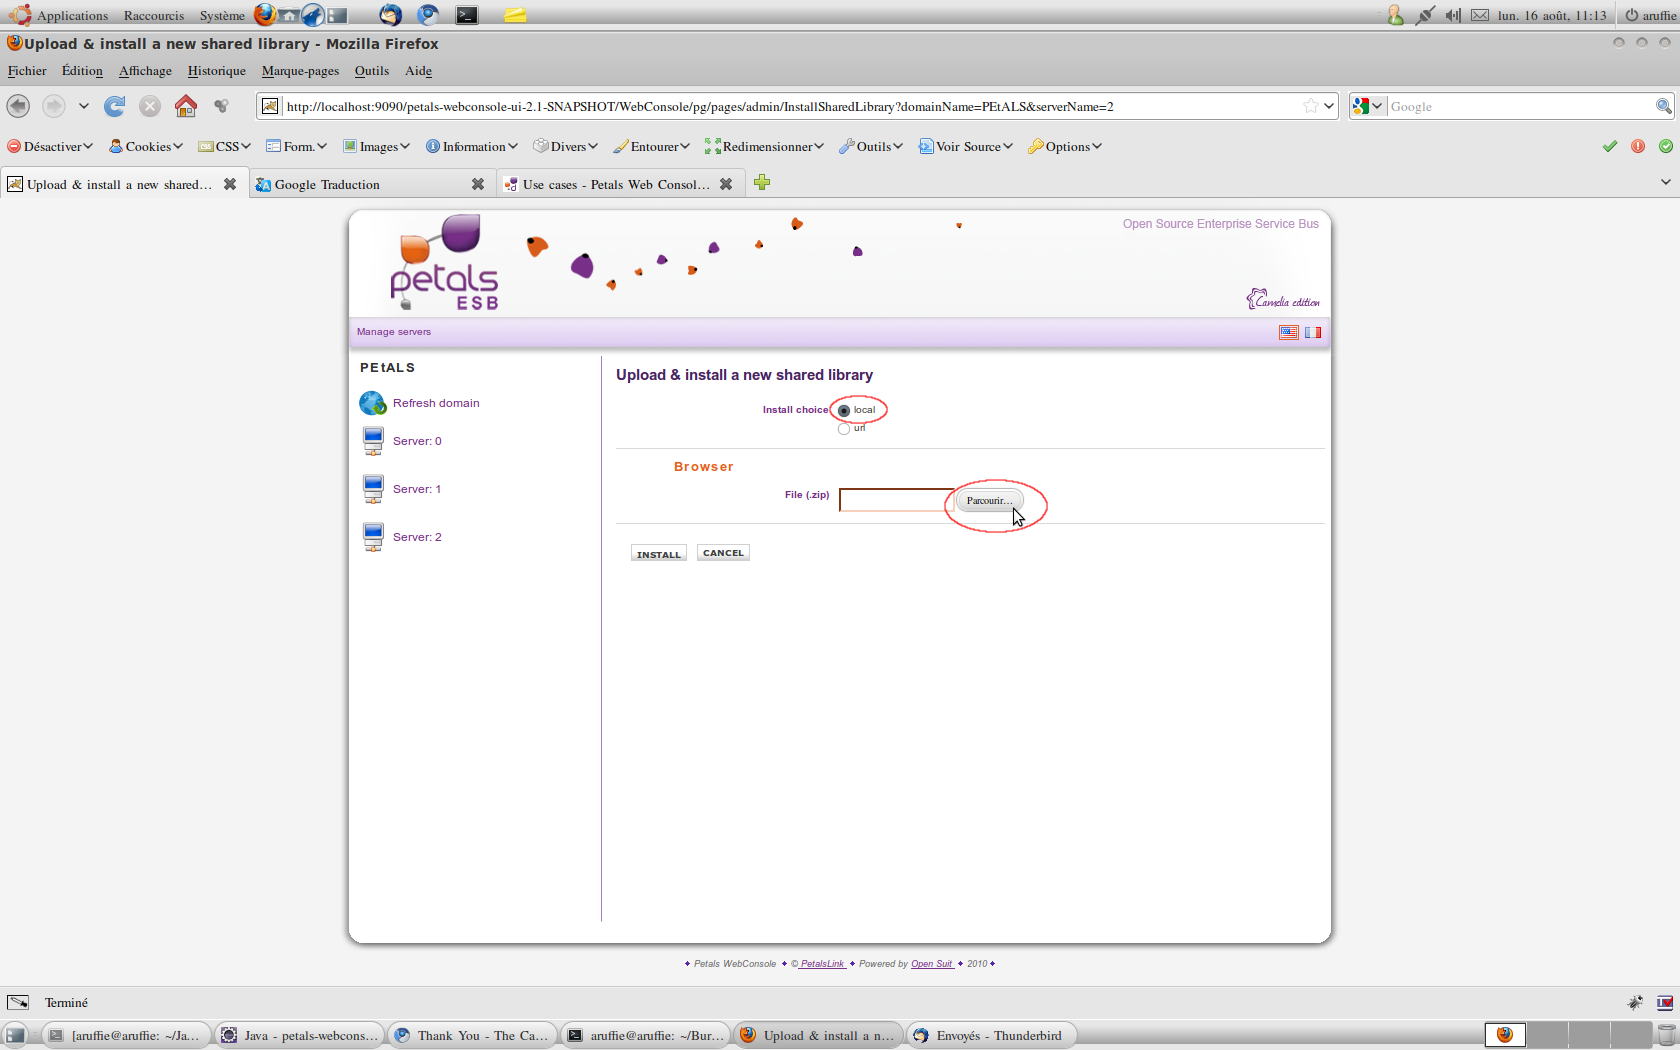
After that the Webconsole displays to you the shared library installation page. In this page for our scenario
you need to select local for installation type choice, because in our scenario we take in account the shared
library which will be installed is located in your local computer. Then you need to click on Parcourir... button
in order to select the desired shared library.
Normally after you click on Parcourir... button your web navigator open to you a new window that allows you
to select one shared library in your director hierarchy (the shared library must be an .zip archive).
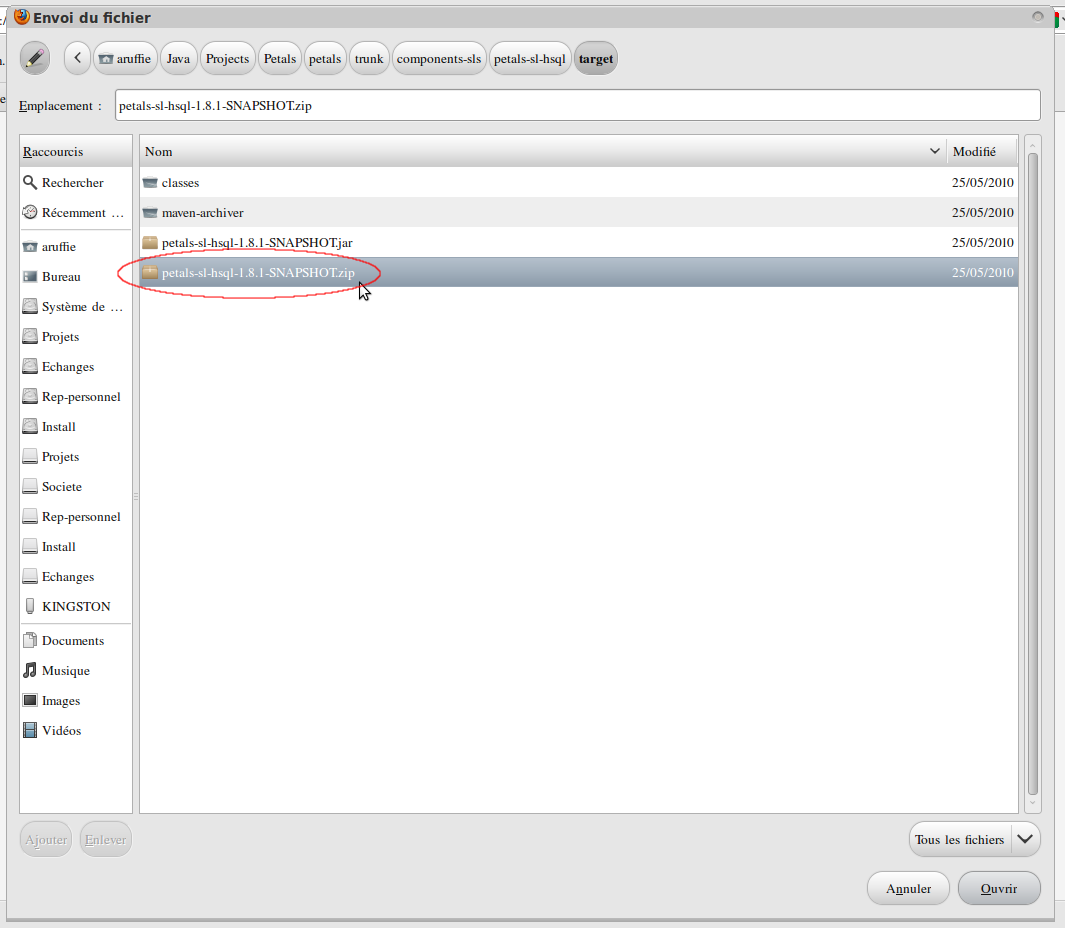
When you have validated the shared library selection, you only need to click on install button in order to
perform the shared library installation on the current container.
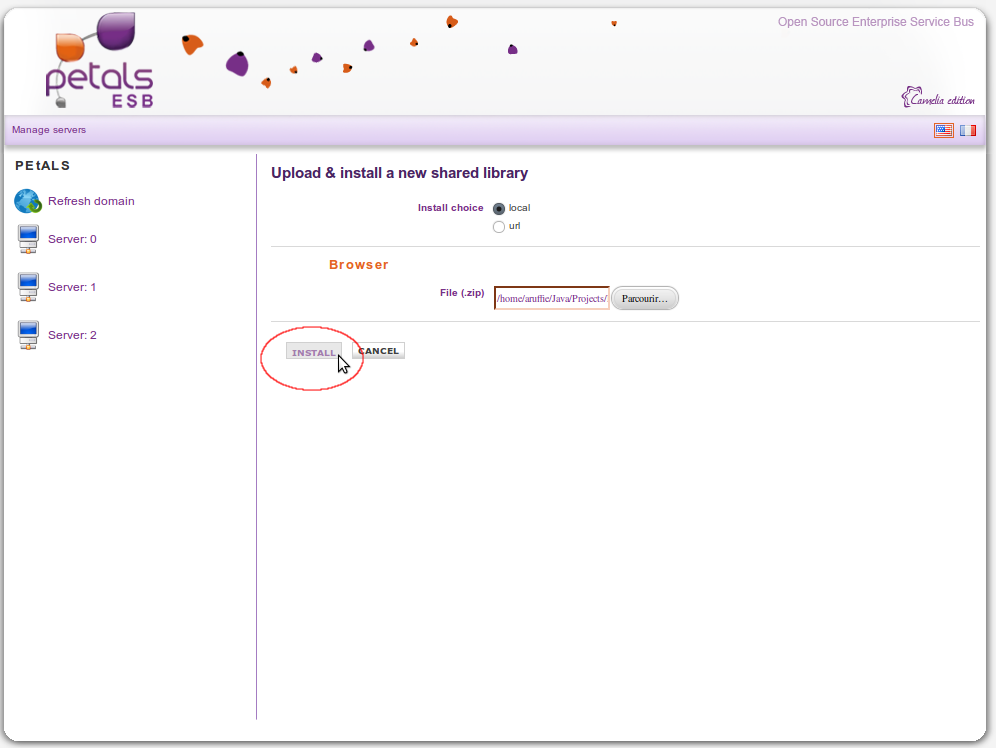
If the Petals container correctly install the shared library you will normally see the installed library in the
shared library management list.

Oops, our scenario is unfortunately already finished ... but you learnt several thing, how to install/start component,
install/start service assembly, install one shared library ...
But wait you still need to clean your container ![]()
Then we will see how to clean your Petals ESB node in the next part.
Uninstall shared library steps:
How you uninstall one shared library ? Nothing complicated, you only need to click on the uninstall button
on current row of the desired shared library which you want to uninstall.
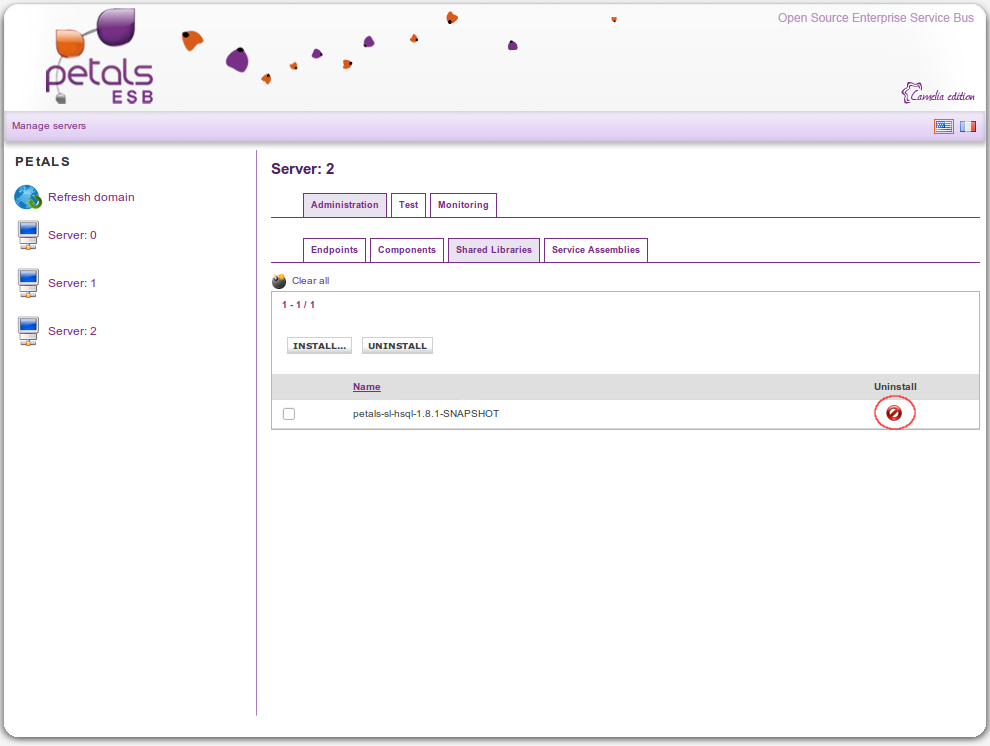
Following this action the current container try to uninstall the shared library and if the result is conclusive
the shared library management list should no longer see the previous shared library.

In the next part we will see how to uninstall the previous installed service assembly.
Uninstall service assembly steps:
During this current section, you will learn how to uninstall a service assembly process.
Before uninstall a service assembly you need to take in account its current state, but why ?
Because to respect the service assembly life cycle ...
For correclty uninstall a service assembly its must be in shutdown state before performing
uninstallation process, and for performing a shutdown action this service assembly must be
in stopped state ...
Therefore we need to perform a stop action on our service assembly before, because it's
in started state.
To realize this stop action you simply need to click on the stop button assigned to this action on
the service assembly current row.

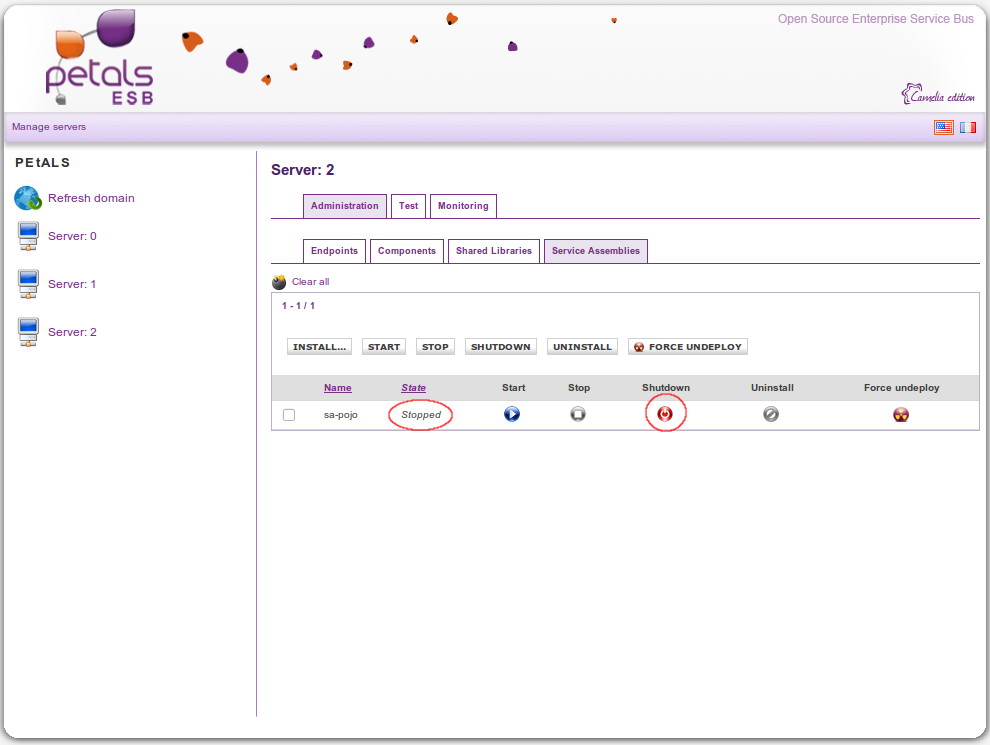
Just after the current container perform this stop action, you should normally see the pojo service
assembly with its state switch to stopped. Now you need to shutdown it before completing the
uninstallation process, for that just click on the shutdown button of the service assembly current
row.
If the shutdown process is successfully performed, you should see the pojo service assembly in
shutdown state. Great, it only remains for you to uninstall the pojo service assembly by clicking
on the uninstall button of the current row.

Finally the service assembly uninstallation process is terminated and you shouldn't normally see
that the pojo service assembly in the service assembly management list.

Our scenario is nearly done, it only remains to uninstall the pojo component in order to
correctly clean our container, it's what we see in the next part.
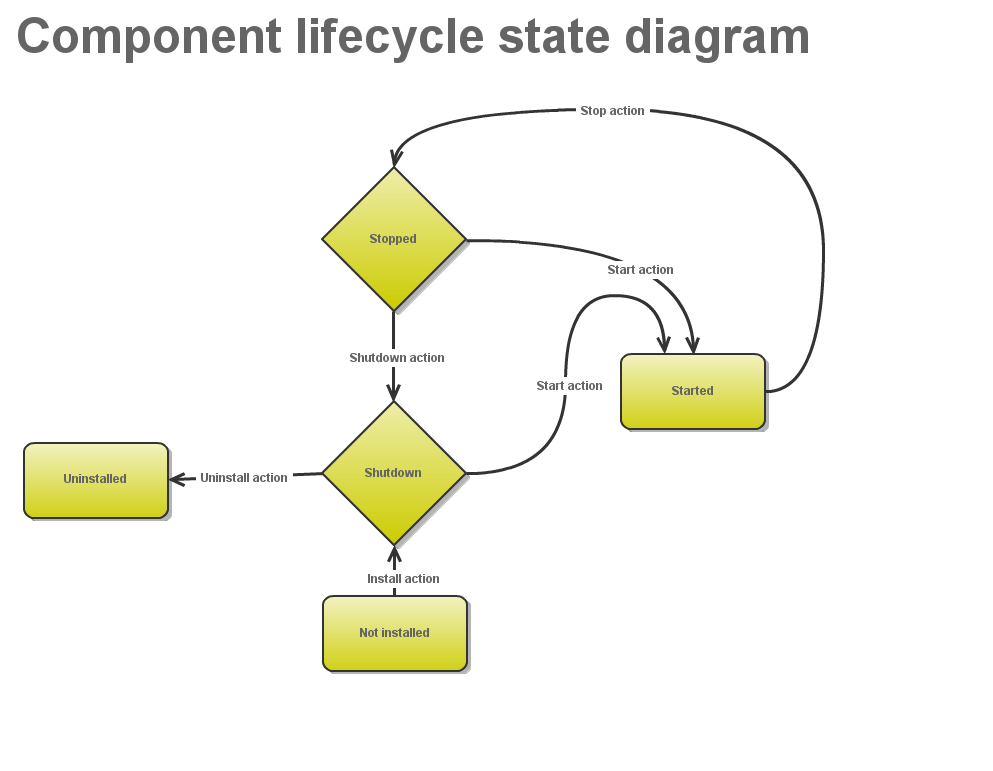
Uninstall component steps:
We will see now how to uninstall one component and its linked process. As well as
one service assembly, a component follows its lifecycle in our container (for this part
you can also see the JBI specification).
|
of the pojo component row.
After the container stop your component, its current state should be changed to
stopped. In order to follow the component lifecycle you need now to shutdown the
component and for that you only need to click on the shutdown button.
When your component is shutdown it's only remains to performs the uninstallation action.
For this last action you need to click on uninstall button of your pojo component row.
If all goes well, you shouldn't normally see the pojo component in the component management
list.
Slim, our use case is already over but during this tutorial you learned several functionalities of the administration tab
of Petals Webconsole. Many advanced functionalities like runtime component attribute configuration, logger level
configuration, server properties configuration ... are present but not shown here.