Setting up your environment
The first thing to do when starting working on a new component is to download and install Apache Maven, and a good IDE (e.g. NetBeans, Eclipse or IntelliJ).
In the rest of this document, it is assumed you use Eclipse as your IDE. When this document references Eclipse actions, you should be able to find equivalents with other IDEs.
Installing and configuring Apache Maven
Apache Maven is a popular "software project management and comprehension tool". In many ways, it can be seen as the successor of - the still popular - Ant tool. Nowadays, Maven is used by an increasing number of software projects, including Petals ESB. An important part of the development of Petals component is based on the use of this tool.
Either install maven with your distribution or do it by hand:
- Download Apache Maven from: http://maven.apache.org/.
- Install Maven using this guide: http://maven.apache.org/download.html.
- Check if the M2_HOME environment variable is pointing to your Maven installation.
- Check if M2_HOME/bin has been added to your system path.
That's it for Apache Maven.
| Info For more information on Apache Maven, you should read the following books: Note : Theses two books where originally a same one: Maven the definitive guide. |
| Releases vs. Snapshots Petals' released Maven artifacts are hosted on Maven Central and are available without configuration. However, snapshot versions are hosted by OW2 on its own Maven repositories. Those can be found at this url: http://repository.ow2.org/nexus/content/repositories/snapshots/ |
Configuring your IDE
Configuring Eclipse
In order to make Eclipse use Maven artifacts, you must install the Eclipse plugin m2e. It is usually installed by default.
Configuring NetBeans
This section must be completed.
Configuring IntelliJ
This section must be completed.
Creating a component
First, decide whether you want to create a Binding Component (BC) or a Service Engine (SE):
- Binding components host services that will act as entry points and exit points for communication protocols. They are intermediaries between what is inside the bus and what is outside.
- Service engines host configured services, such as a XSLT transformation, or a BPEL application.
In both cases, service-units instantiate the features offered by the component, by providing a configuration and artifacts.
Once this is done, you should pick up a name for your component, following the Petals ESB component naming conventions:
- petals-bc-componentName for binding components.
- petals-se-componentName for service engines.
...
This section must be completed.
...
The main files to notice are:
- The pom.xml, which holds the Maven dependencies.
- The src/main/jbi/jbi.xml, which is the component JBI descriptor.
- The src/main/jbi/.xsd* files, which define the structure of component configurations.
For a service engine:
- JBIListener.java, which handles JBI messages coming from the bus.
- The ServiceEngine class, which defines the component and manages its life cycle.
For a binding component:
- JBIListener.java, which handles JBI messages coming from the bus.
- ExternalListener.java, which handles messages coming from outside the bus.
- The BindingComponent class, which defines the component and manages its life cycle.
Compiling an deploying a component
Once you have developed your component, the normal next step is to compile it and try to deploy it on Petals.
To compile your component, open a terminal inside the project directory, and execute one of the following commands:
# Just compile
mvn compile

# Compile and build it for deployment
mvn install
With the second command, on a successful build, the result component archive is available in the target folder of your component project. This archive (*.zip) can be deployed in Petals in two ways:
- The first one is to use the Petals administration console.
- The second and most simple one is to copy this archive in the install directory of your Petals installation. This solution perfectly fits development mode.
In any case, you must start Petals before deploying your component.
A successful deployment in Petals is a first validation of your component (but clearly not enough).
Testing and debugging a component
Debugging a component
Although debugging needs you to have some tests to run, it seems a better option to introduce how to debug a component, prior to explain how to test it.
Debugging a component needs three simple steps:
- Stop your Petals. Execute its debug script (debug.bat / debug.sh).
- In your IDE, use the remote debug feature to launch Petals (see below for details).
- Add breakpoints in your component code.
Using Eclipse
In Eclipse, the remote debug feature can be used by selecting Run > Debug Configurations...
On the left, right-click on Remote Java Application and click New.
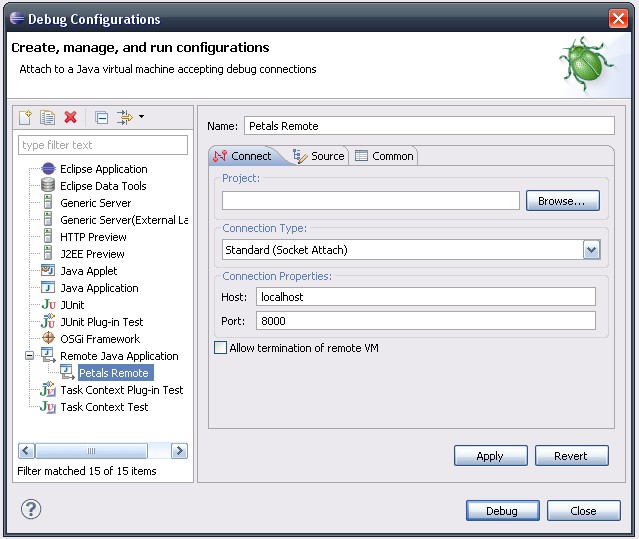
In the Name field, type in Petals Remote.
In the Connect tab, type in the Petals host and port (usually, localhost and 8000).
In the Source tab, make sure your component project is in the displayed sources.
If not, click Add... In the open dialog, double click Java Project, select your project and click OK.
Click Apply to save the debug configuration.
Click Debug to launch Petals in debug mode. The terminal in which you launched the debug script should now display that Petals is starting.
You can now build and deploy your component in Petals.
Do not forget to add breakpoints inside your component code. Defining them before or after the build / deployment has no incidence on the debugging.
To make debugging effective, you must manage to make your code to be called.
This is achieved by creating some configurations / tests for your component.
Using Netbeans
This section must be completed.
Using IntelliJ
This section must be completed.
Testing a component
Testing a component can be seen from two points of view.
The first one is the industrial test campaign, which relies on continuous integration (e.g. Hudson), and which is based on Maven and JUnit. Clearly, it is not in the scope of this document to discuss this kind of tests (although EBM WebSourcing has set up this kind of tests on its side).
The second way to consider testing is related to debugging, and consists in making small unit of tests to check the behavior of your component. They can be seen as check tests that complete code verification. This kind of test requires you to create service assemblies for your component, and play with the different parameters a service-unit can hold. Defining such service assemblies is a primary step toward continuous integration, though it is not enough (you will probably not cover all the possible cases).
The methodology for running these tests is the following:
- Start Petals in debug mode (and add breakpoints if necessary in your component code).
- Build and deploy your component in Petals.
- Deploy the service assembly to test with your component (and check that it goes fine).
- Deploy the sample client component (available on the Petals website and in the Petals Quick Start versions).
- Once deployed, the sample client launches a Swing dialog which allows you to call any service inside Petals.
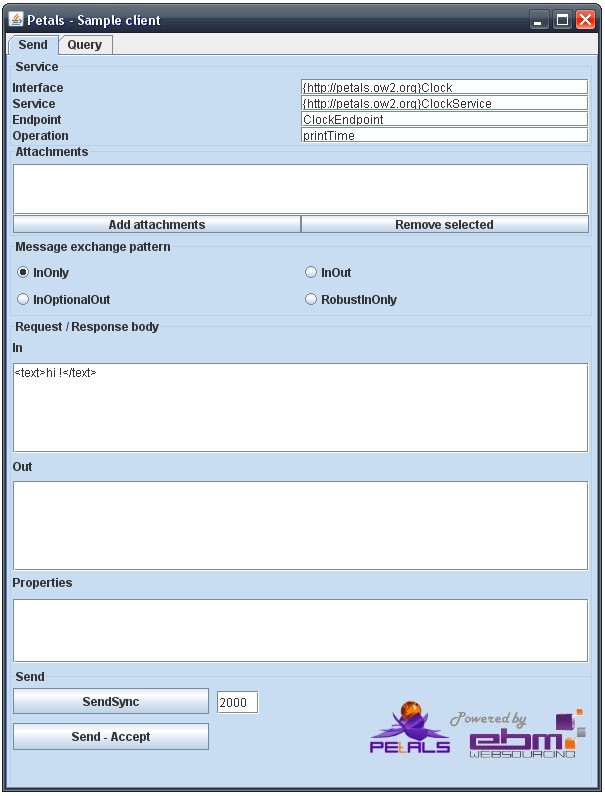
In the sample client dialog, go into the Query tab and click Find all the endpoints.
A list of Petals services appears in the lower part of the dialog. If the deployment of your service assembly went fine, you should find it in the displayed list. Double click it and go back in the Send tab. Play with the Message Exchange patterns (MEP) and the In request (which must be an XML document). Eventually, use the SendSync or Send--Accept buttons to send your message to your service.
The sent message should be received and processed by your component.
If you launched Petals in debug mode and added breakpoints, the execution should be suspended when a breakpoint is reached at runtime.