


Server configuration clarification
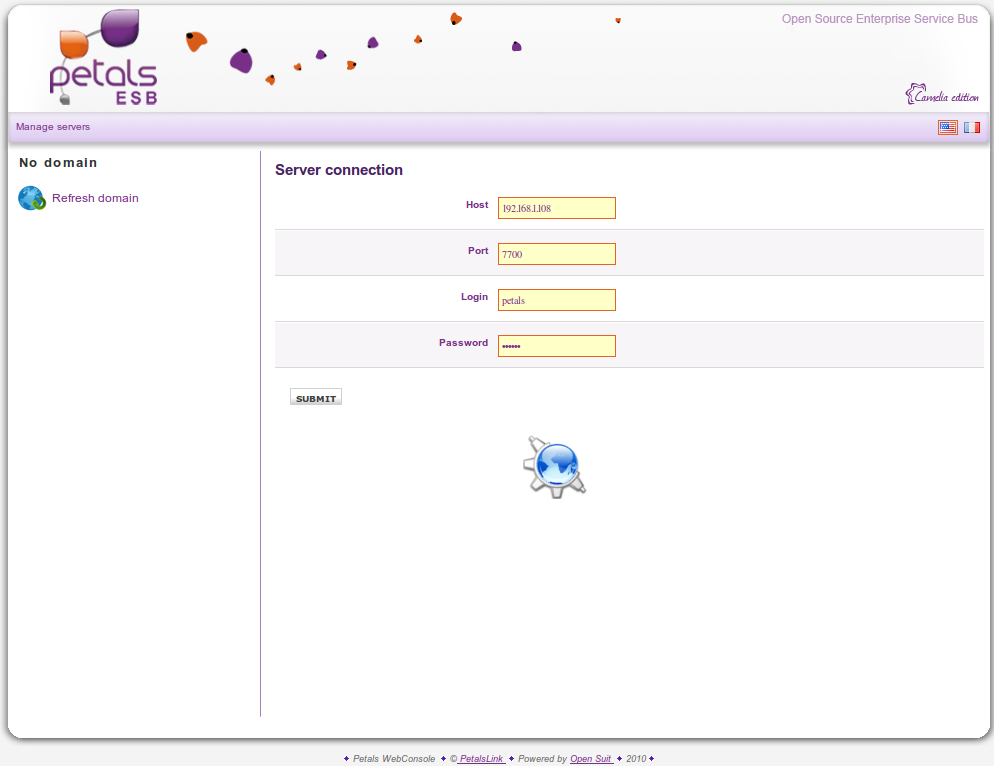
Petals Webconsole contain an automatic mechanism that it allows to try to connect to a server declared into the webconsole.xml file,
this file is located into /WEB-INF/classes/webconsole.xml and its associated XML schema (webconsole.xsd).
Server connection configuration through Webconsole interface
By clicking on the following button:
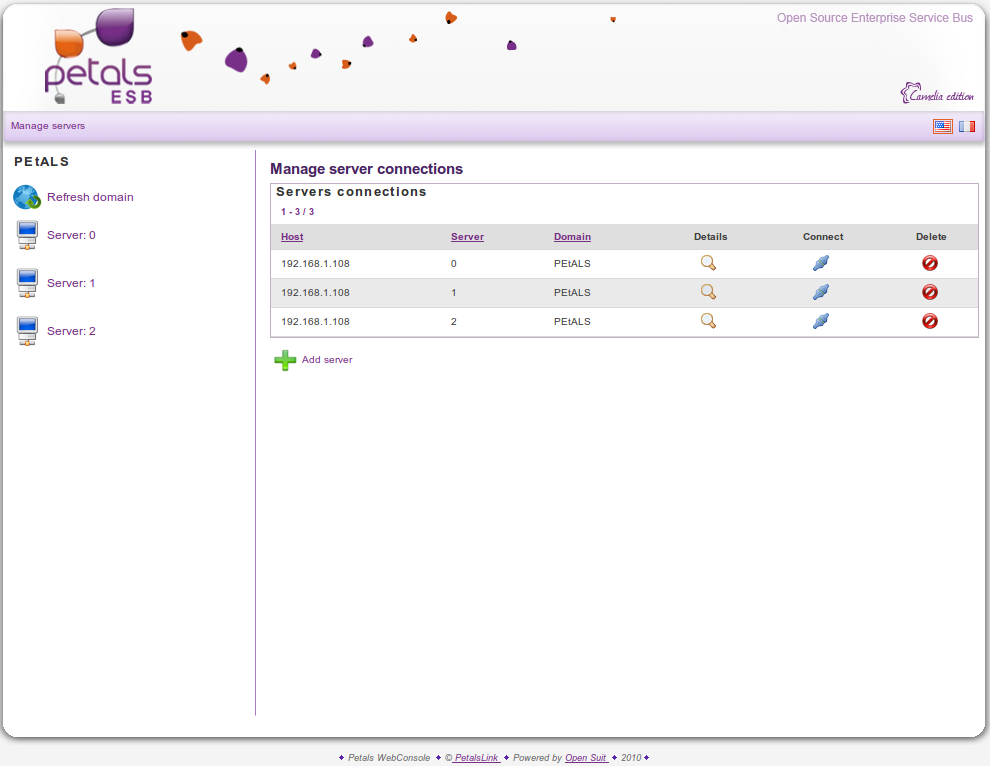
You can access in the Petals Webconsole the management view of servers declared into webconsole.xml, management
functionalities available are:
- Create new server.
- Delete old server.
- Modify declared server.
- Switch the current server connection.
You can add a new server by clicking on Add server in the server management view:
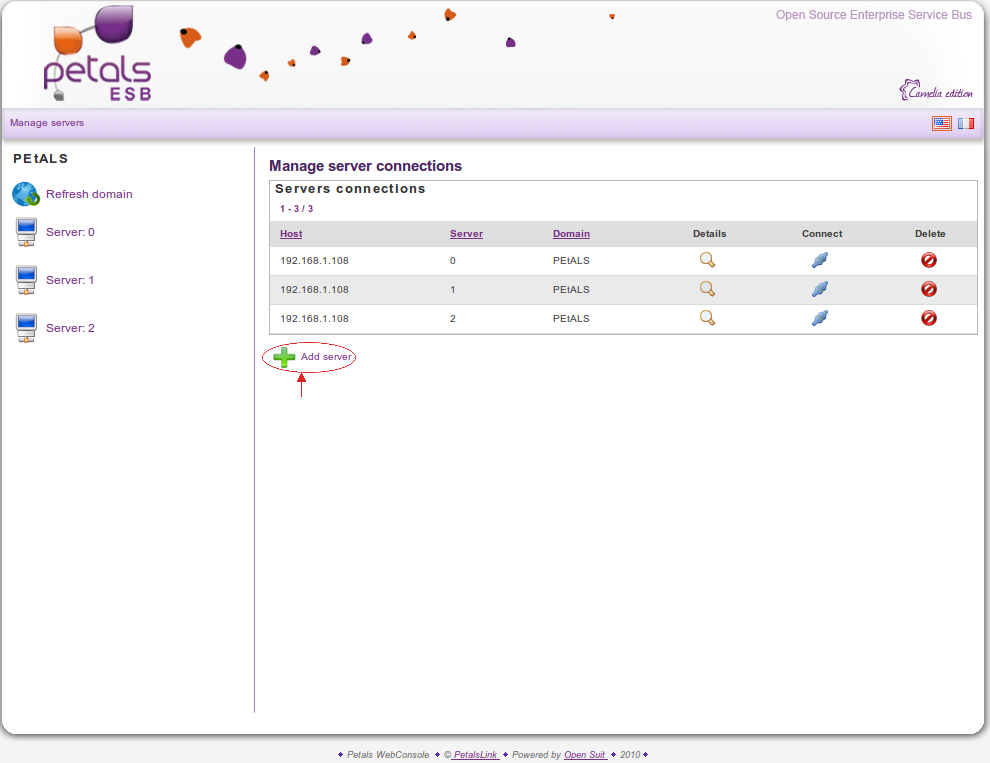
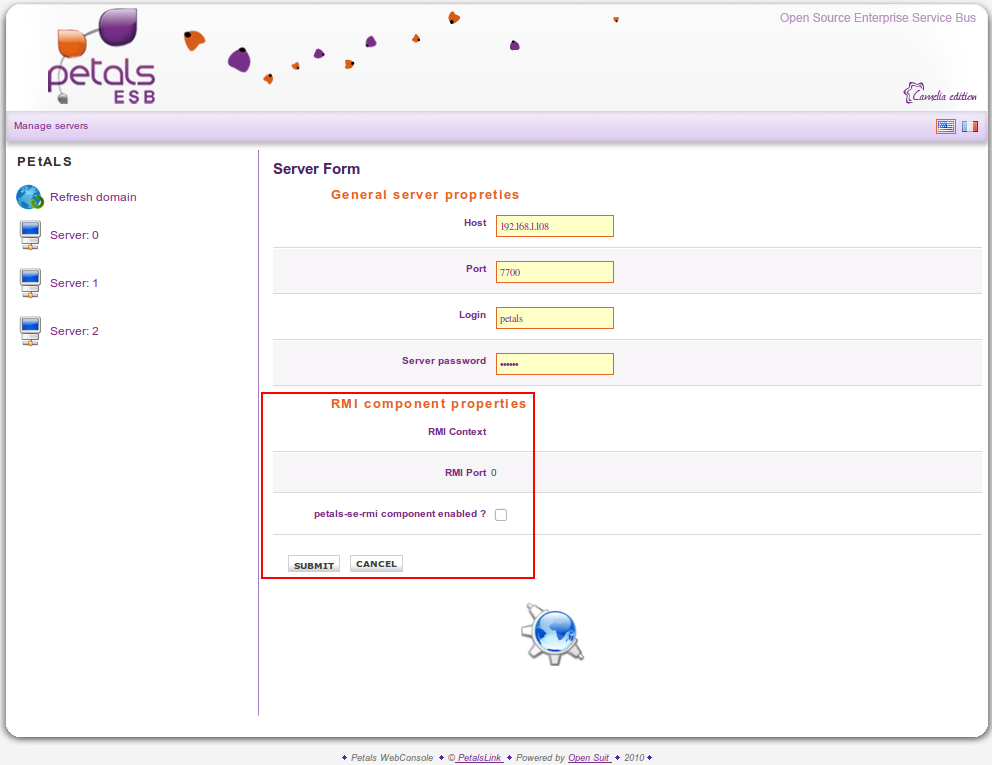
This action displays to you the server creation form:

For the moment just stay focused on the general server properties because the RMI component
properties part will be addressed in the Remote component configuration part of this documentation.
In the general server properties part the following server parameters must be defined:
- The hostname or ip address of the new Petals server.
- The JMX connection port of the server.
- The JMX login connection of the server.
- The JMX password connection of the server.
When you submit the form a new server should be created in server list and this server should be also added into the
webconsole.xml, if it isn't already defined.
You can also modify server properties by editing the desired server (by clicking on details icon:  in the server list):

After clicking on the link you return to the creation server form but this time in order to change current server
properties and not to create a new server.
Another good feature is to allow to remove an old server if it isn't necessary for the moment in the server list,
this removal can be performed by clicking on the following icon: 
![]() Warning: If you have stacktrace due to failed connections, please verify if at least one declared server
Warning: If you have stacktrace due to failed connections, please verify if at least one declared server
in the webconsole.xml can be acceded. Other careful point, we recommend to you that don't keep this
configuration file empty (keep at least one server in order to allow the webconsole to try a connection, even
if the Petals ESB node is down).
You can also switch or connect to one server of the list, by only clicking on the connection icon:

It's useful in order to change of current Petals Domain.
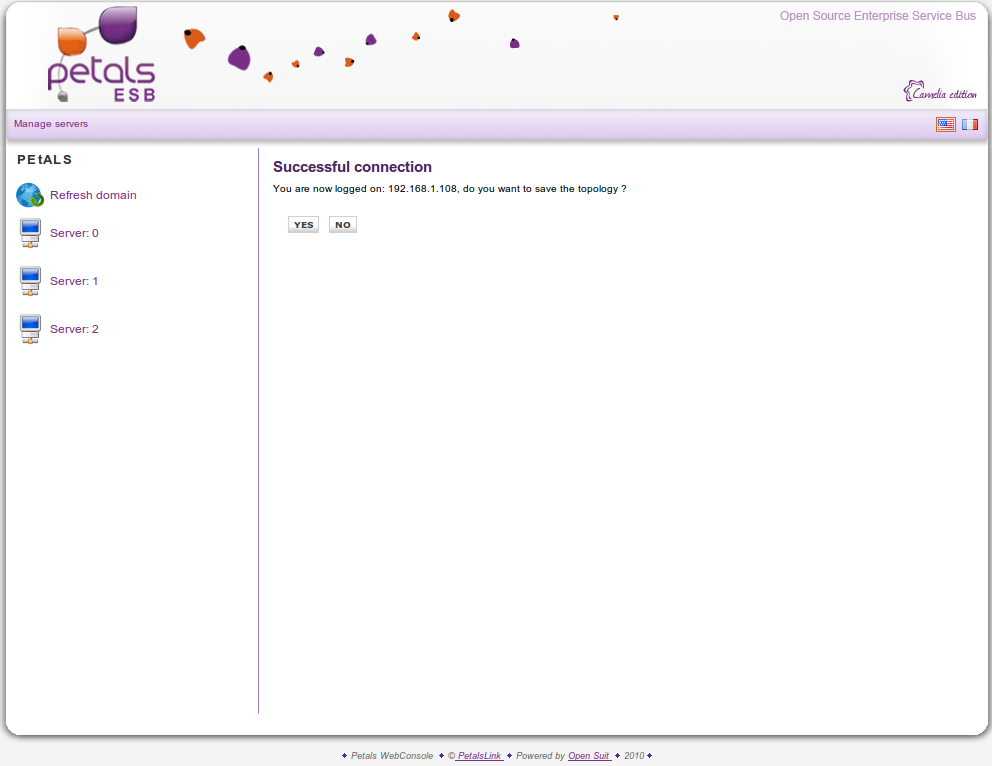
When you try a new server connection and if the connection is available, the Petals Webconsole
allows you to save the complete recovered topology.
Server connection configuration through webconsole.xml
You can also perform the previous features (create, delete, modify ... server) directly in the webconsole.xml under
/WEB-INF/classes/webconsole.xml. Just modify XML attributes to perform server properties modification, or
add/remove Server XML element in order to add/remove a server in configuration file.
<ns:Servers xmlns:ns="org.ow2.petals.tools.webconsole.xmlbeans"
	xmlns:xsi="http://www.w3.org/2001/XMLSchema-instance"
	xsi:schemaLocation="org.ow2.petals.tools.webconsole.xmlbeans webconsole.xsd ">
	<ns:Server port="7700" login="petals" password="petals" host="localhost">
		<installedrmicomponent>true</installedrmicomponent>
		<rmiport>1099</rmiport>
		<rmicontext>RMIComponentContext</rmicontext>
	</ns:Server>
</ns:Servers>
![]() Information: To aims of keeping the webconsole.xml configuration file valide, you can use the associated XML schema
Information: To aims of keeping the webconsole.xml configuration file valide, you can use the associated XML schema
webconsole.xsd located in the same location.
Remote component configuration
RMI configuration through Webconsole interface
In the same form where you create or modify one server configuration, you can set
a configuration for RMI component that allow to establish a remote communication
between Petals Webconsole and Petals ESB.
RMI component must be declared into the webconsole.xml configuration file and
started in you Petals ESB node, where it is declared.
In this form part dedicated of the RMI component properties declaration two fields can be filled:
- The RMI context, it must be the same as that the petals-se-rmi component
deployed on the Petals node. - The RMI port, it must be consistent with that declared in the petal-se-rmi.
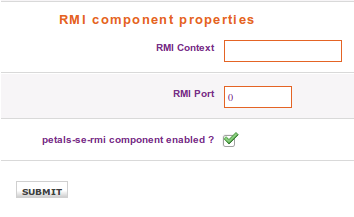
If you have declared one RMI component in the configuration file but if isn't available on the
Petals node, you can thank to the form's checkbox (petals-se-rmi component enabled)
disabled it in the Webconsole while keeping it declared:
RMI configuration through webconsole.xml
You can also perform the previous features for the RMI component directly in the webconsole.xml under,
as the same way that server declaration. Just modify the XML according to the webconsole.xsd scheme.
<Server ... >
   <installedrmicomponent>false</installedrmicomponent>
   <rmiport>1099</rmiport>
   <rmicontext>RMIComponentContext</rmicontext>
</Server>
  <xs:complexType name="_Server">
    <xs:sequence>
    	<xs:element name="installedrmicomponent" type="xs:boolean" maxOccurs="1" minOccurs="0"/>
    	<xs:element name="rmiport" type="xs:int" maxOccurs="1" minOccurs="0"/>
    	<xs:element name="rmicontext" type="xs:string" maxOccurs="1" minOccurs="0"/>
    </xs:sequence>

    ...

  </xs:complexType name="_Server">
![]() Information: To aims of keeping the webconsole.xml configuration file valide, you can use the associated XML schema
Information: To aims of keeping the webconsole.xml configuration file valide, you can use the associated XML schema
webconsole.xsd located in the same location.
![]() Caution: the following message may means that a RMI component isn't declared in the webconsole.xml, or disabled
Caution: the following message may means that a RMI component isn't declared in the webconsole.xml, or disabled
in this configuration file:
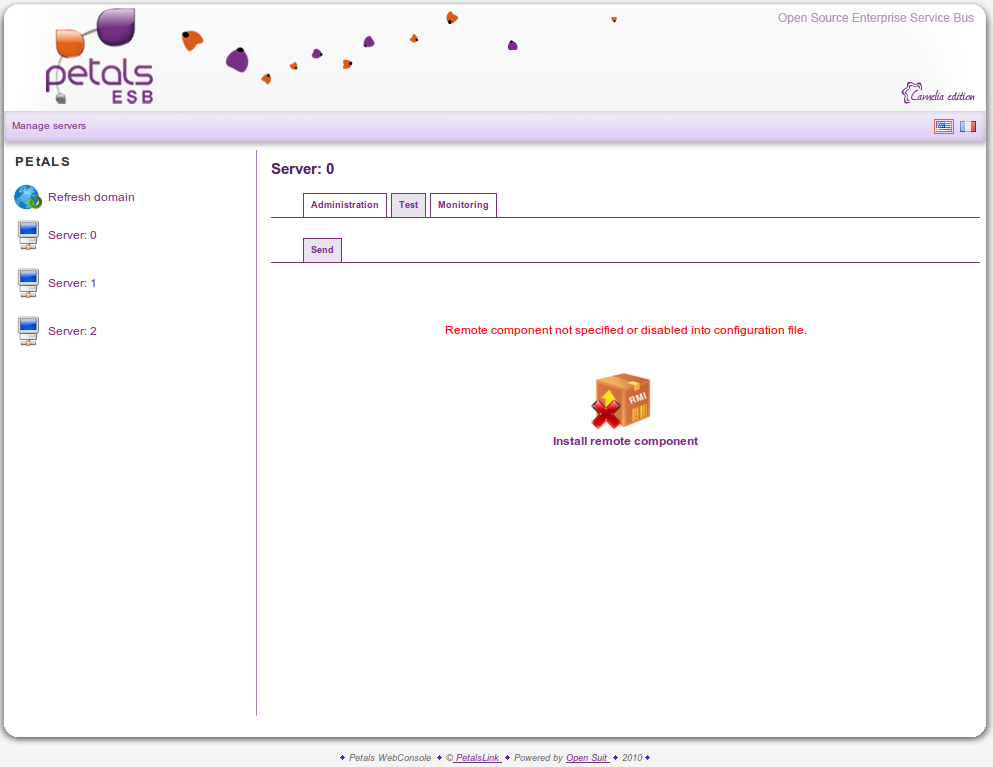
![]() Caution: the last following message may means that a RMI component isn't deployed, isn't started on the Petals ESB node where
Caution: the last following message may means that a RMI component isn't deployed, isn't started on the Petals ESB node where
it is declared or simply the associated port don't match:
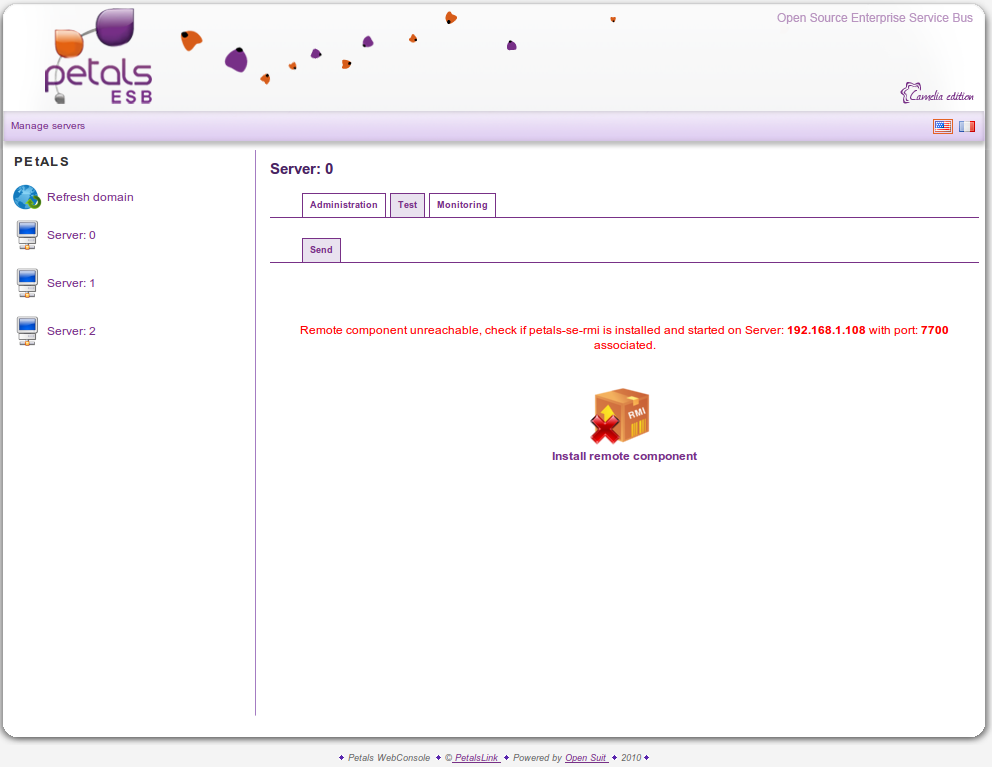
| Automatic remote componet installation If you click on "Install remote component", the Petals Webconsole automatically install a remote component packaged with the current version. The current version is packaged with the petals-se-rmi for remoting communication to Petals ESB. The Webconsole transfers you to the installation interface and automatically select URL installation and provide the url which match the packaged petals-se-rmi that will be installed, when you confirm the installation on the current Petals ESB node. |

The previous screen displays the automatic remote component installation (you have just to submit the installation form).
General properties file presentation
Petals Webconsole contain a file where several general properties can be configured, some of these
are really useful and need a correct configuration and not hang lightly.
The general.properties
Several properties affect the Webconsole configuration instead other affect displayed error messages.
Repository setting
# --- Cache control of the RestResourcesServlet ---#
cache-control=private, max-age=60
This property allows to define cache parameters like control, age ... for uploaded files by the Petals webconsole
Parameter examples:
- 'private' meaning for cache-control header value:
* Can be cached only by single-user caches, such
* as in a browser; must not be cached by multiuser
* caches in proxy servers.
- 'max-age=60' meaning for cache control header value:
* Serve from the cache only until the
* specified number of seconds since the original
* request has elapsed.
You can found more informations at http://www.w3.org/Protocols/rfc2616/rfc2616-sec14.html
section 14.9 Cache-Control
Table access right settings
# --- Access rights for administration tab ---
access.rights.administrator=true

# --- Access rights for test tab ---
access.rights.tester=true

# --- Access rights for monitoring tab ---
access.rights.supervisor=true
These properties allows to displayed or not each tab in the Petals Webconsole
Distributed setting
distributed.installation=false
This property disallow local file upload for artefact installation, but why ?
Because if loadbalacing between several web server is active, you cannot
predic on which server the artefact will be uploaded. Set to true this
property in order to force user to use URL instead LOCAL installation,
because in distributed Webconsole deployment perfom artefact installation
by URL is more consistent in this kind of environment.
Cleaner setting
cleaningworker.laptime=120000
The previous property allows to set the lap time for the workers/cleaners of remote connections,
the value is in milli-seconds. The purpose of these workers is to clean and release unused JMX
connections establish with Petals ESB, in the connection pool into Petals Webconsole.
Logger setting
The Webconsole use log4j implementation for application logger. You can set the
logging level for each package that you like, example:
<logger name="org.ow2.petals.tools.webconsole" additivity="false">
   <level value="error" />
   <appender-ref ref="stdoutVerbose" />
</logger>

<logger name="org.ow2.petals.tools.webconsole.services.utils" additivity="false">
   <level value="debug" />
   <appender-ref ref="stdoutVerbose" />
</logger>
You can precise the package that you target by "name" attribute of the logger "node" example "org.ow2.petals.tools.webconsole, org.ow2.petals.tools.webconsole.services.utils, ..."
and you can precise the logging level with the "value" attribute of the "level" node example "error, debug, ..."
Error message settings
number_format_error=Number format error
unknow_host_error=Unknow host error
petals_service_error=Petals service error
petals_console_error=Petals console error
user_action_error=User action error
configuration_error=Configuration error
sax_error=Sax exception error
parser_configuration_error=Parser configuration error
factory_configuration_error=Factory configuration error
wsdlexception_error=WSDL exception error
malformed_url_error=Malformed url error
ioexception_error=IO exception error
uri_syntax_error=Uri syntax error

file_not_found_error=File note found error
rmi_server_configuration_error=Rmi server configuration error
illegal_argument_error=Illegal argument error
class_loader_error=Class loader error
configuration_file_error=Configuration file error
selected_endpoint_error=Selected endpoint error
transformer_error=Transformer error
transformer_factory_configuration_error=Transformer factory configuration error
messaging_error=Messaging error
download_attachment_error=Download attachment error
form_field_error=Form field error
All these previous properties allow to modify displayed error message titles in Webconsole interface, when each
king of error occurred.
These error message titles may be modified only by the Petals Webconsole Administrator if a more explicit message should be displayed
to Petals Webconsole users (or if the title isn't correctly understandable).