Creation of jbi.xml files
When you create a Service-Unit project, a Service Assembly project or a Component project, a jbi.xml will be created automatically.
If you need to create one by hand, it is possible by selecting File > New > Petals > JBI Descriptor.
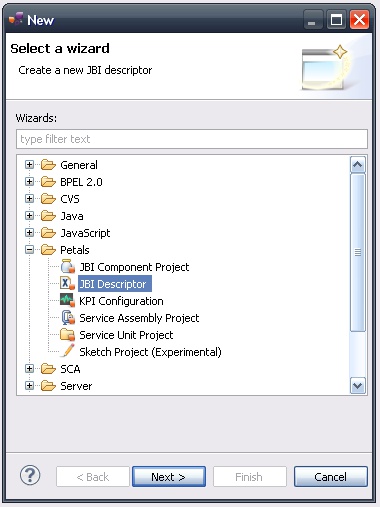
Click Next.
On the next page, select the location where this file should be created.
If necessary, check the Overwrite option to overwrite an existing jbi.xml.
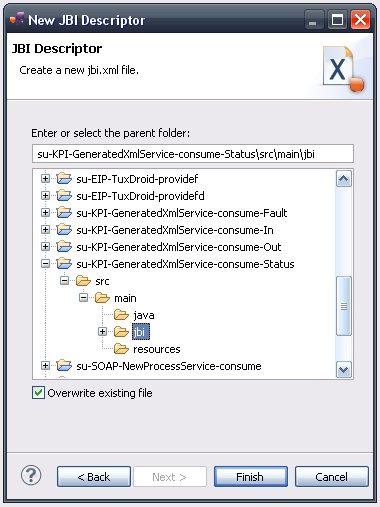
Click Finish.
The newly created jbi.xml is open in the JBI editor, ready to be completed.
Edition of jbi.xml files
The Petals studio comes with an editor that eases the edition of jbi.xml files: the JBI editor
This editor is made up of a source tab, sometimes coupled to additional tabs.
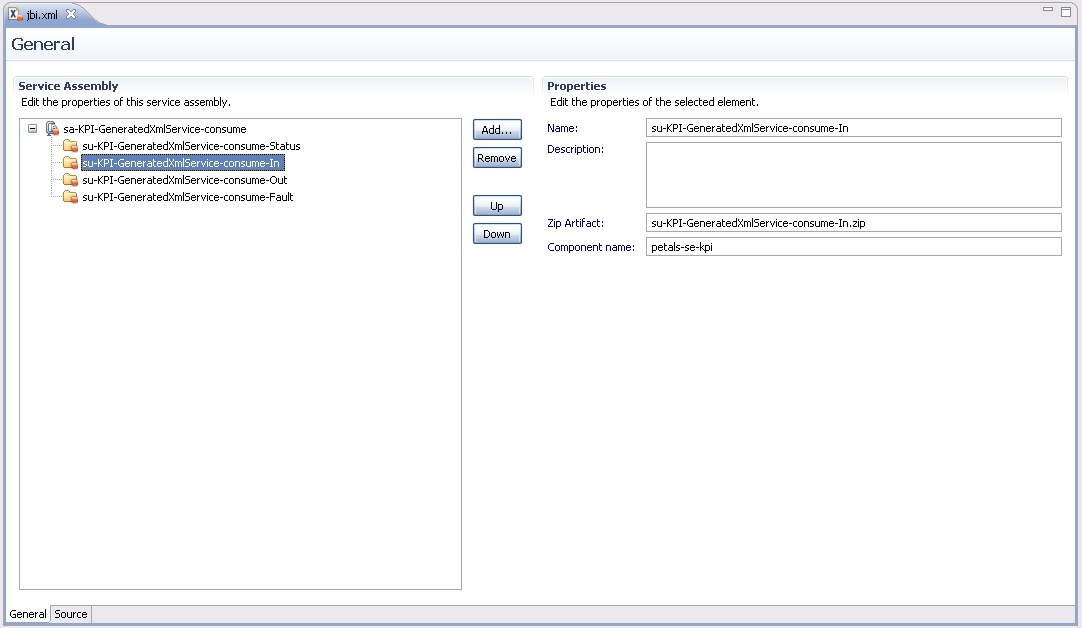
As an example, this is what this editor looks like for Service Assembly (SA) projects.
The main thing to know about this editor, is that it is sensitive to the edition context.
And more precisely, it is sensitive to the nature of the project that contains the jbi.xml.
Thus, the JBI editor will not provide the same user interface, depending on whether the jbi.xml is in a SU, a SA project...
The project nature will determine which tabs are shown or not.
With Service-Unit projects
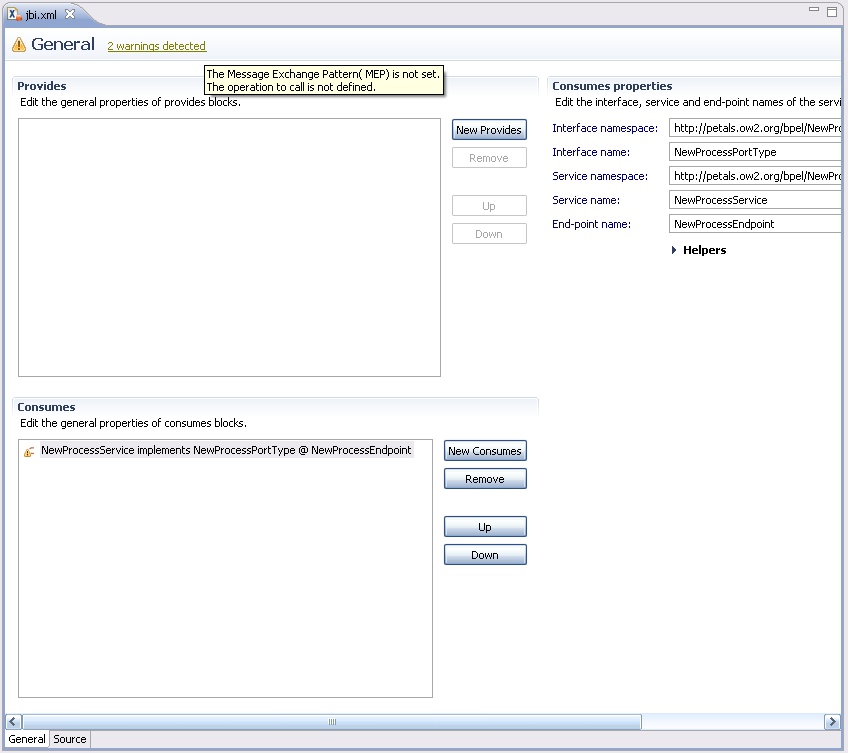
When you edit jbi.xml located in SU projects with the JBI editor, you have currently two tabs.
The first one is called General and provides a user interface to define standard properties of service providers and consumers.
Provides and consumes blocks are listed on the left, while their properties are displayed on the right part of the editor.
This tab provides some helpers to ease the edition. It is introduced specifically in the sections below.
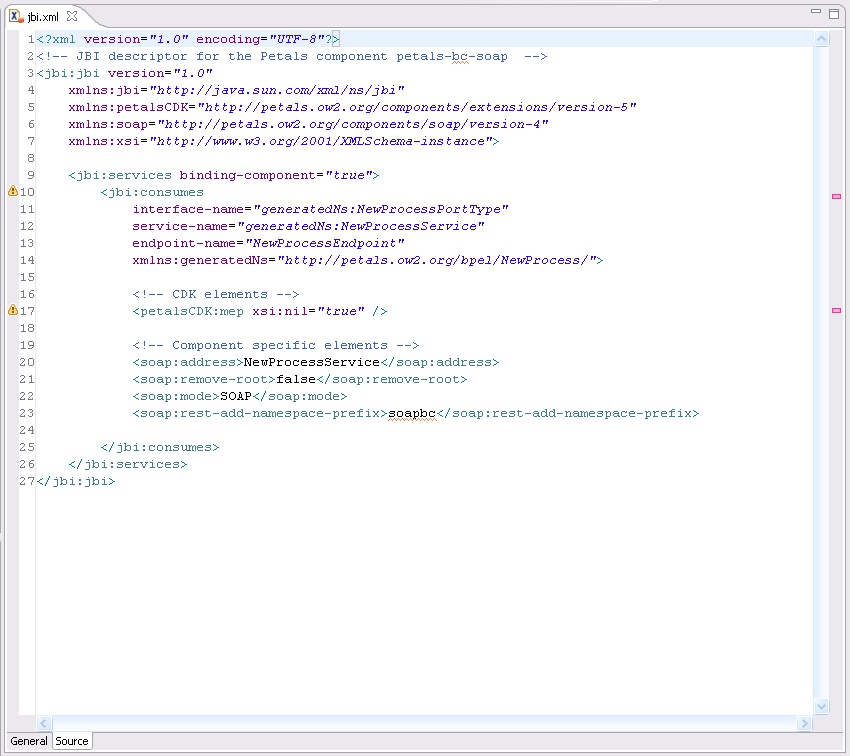
The second tab is a Source tab, based on (and extending) the Eclipse XML editor.
This source tab is described more precisely further.
Editing PROVIDES sections
Provides blocks are listed on the left, in the top part.
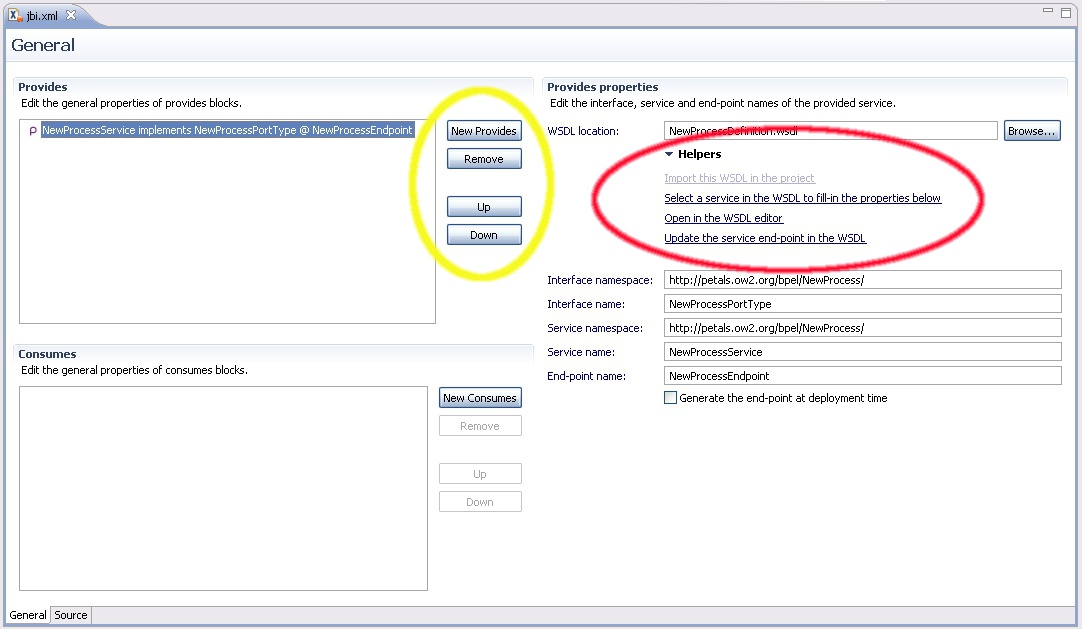
You can add a new provides block, remove one or change their order using the buttons on the right (circled in yellow).
WSDL location indicates the location of the WSDL that described the provided service.
It can be any URL. Clicking Browse... opens a selection dialog which lists all the WSDL files located in the SU project.
Interface, service and end-point names define the properties of the service.
Activate Generate the end-point at deployment time if you want to let Petals generate the end-point name.
| The auto-generation of the end-point means the service end-point is generated at deployment time. By deploying a such service-unit on n Petals nodes, you would have n times the same service, implementing the same interface, but available at n different locations. |
| Using the end-point generation does not make sense for all the service providers. It depends on the use case. |
Some helpers are available, under the Helpers box (circled in red):
- Import this WSDL in the project
If the WSDL is outside the project (e.g. a remote URL), this helper launches the wizard to import a WSDL and predefine the values.
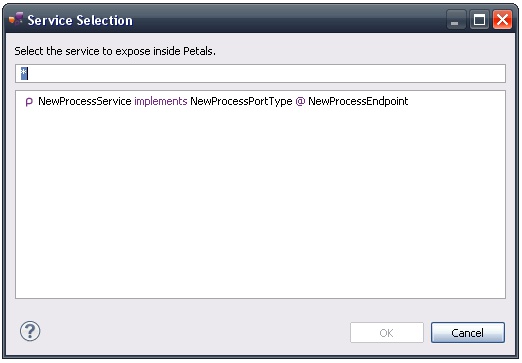
- Select a service in the WSDL...
This helper opens a dialog listing all the services available in the WSDL. You can then select the service you want to fill-in the interface, service and end-point properties.
- Open in the WSDL editor
This helper opens the referenced WSDL definition in the WSDL editor.
- Update the service end-point in the WSDL
This helper changes the end-point name in the WSDL and sets the one used in the jbi.xml. This helper is particularly useful when you want Petals to generate the end-point name at deployment time.
Editing CONSUMES sections
Consumes blocks are listed on the left, in the bottom part.
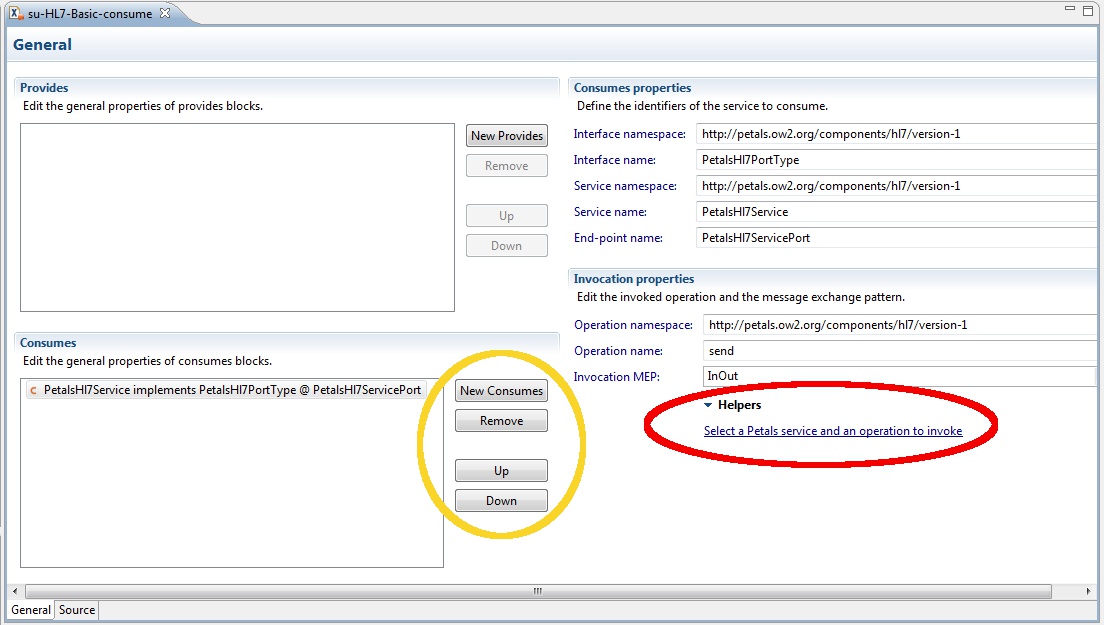
You can add a new consumes block, remove one or change their order using the buttons on the right (circled in yellow).
Interface, service and end-point names define the properties of the service to consume.
| These fields must match those of a Petals service which has a jbi.xml containing a provides block. |
One helper is available, under the Helpers box (circled in red).
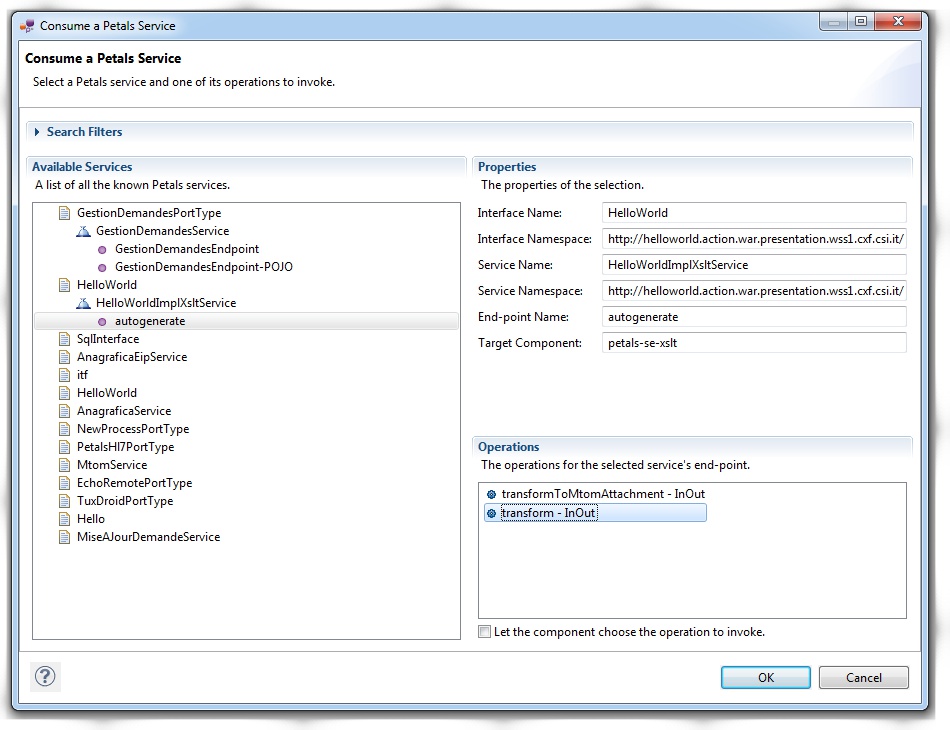
- Select a Petals service and operation to invoke
This helper opens a selection dialog listing all the services from the Petals Services view.
You can then select the service you want to fill-in the interface, service and end-point properties. You can also select the operation to invoke or decide to let the component select the right one. The invocation MEP will be determined automatically.
With Service Assembly projects
When you edit jbi.xml located in SA projects with the JBI editor, you have two tabs.
The first one is called General and provides a user interface to select the service-units to embed, as well as to edit their properties.
When a service-unit is added to this service assembly, a link is created between the SA and SU projects.
| This relation between the SU and the SA projects does not make sense outside Eclipse. When you add a new SU in a SA, you should update the pom.xml of the SA project, and reference the SU project. There is an option in the Petals preferences to update automatically the SA's POM when its jbi.xml file changes. |
The second tab is a Source tab, based on (and extending) the Eclipse XML editor.
This source tab is described more precisely in the next section.
With other projects
For any project, the JBI editor shows a Source tab.
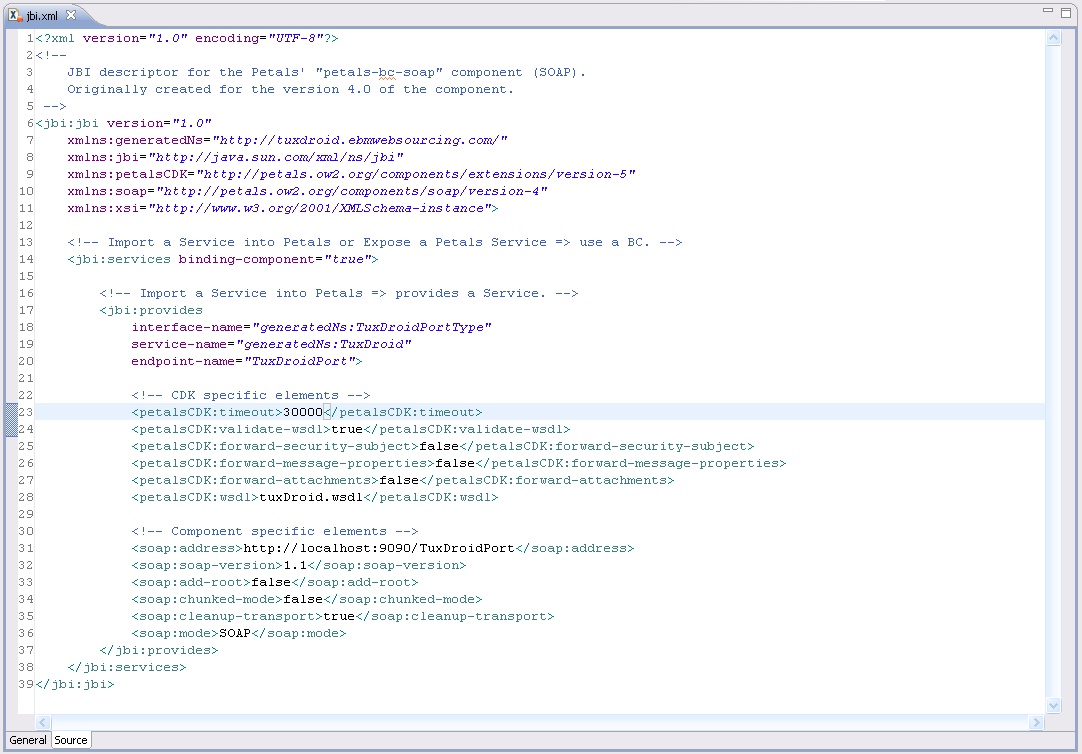
This tab extends the Eclipse XML editor, and provides some additional features:
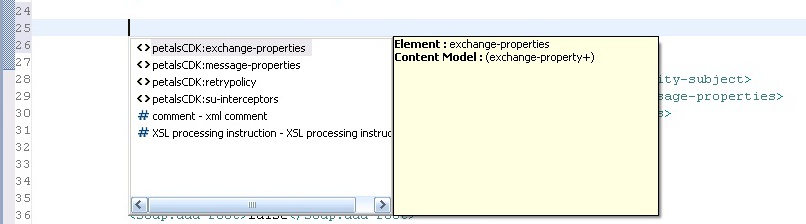
- Content assistance, based on the XML Schemas of Petals.
The proposals are strictly filtered (the insertion of these elements is simulated to determine whether a proposal is valid or not).
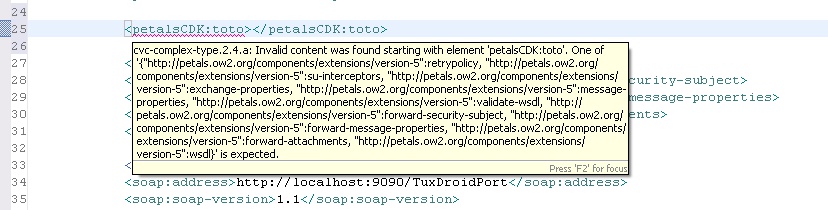
- Built-in validation, based on the XML Schemas of Petals.
This feature is related to the previous one, since they both rely on the same structural description.
- File browsing.
By pressing Ctrl and moving your mouse on a XML element defining a file, you can open this file.

When other tabs are visible in the editor, the source and the other tabs are generally synchronized in memory (no need to save the file to switch between tabs).
Validation of jbi.xml files
Petals Studio embeds a builder that can validate jbi.xml files.
When located inside a Petals project, jbi.xml files are automatically validated on each file modification.
Notice that this behavior can be changed in the Project menu (enable or disable Build Automatically).
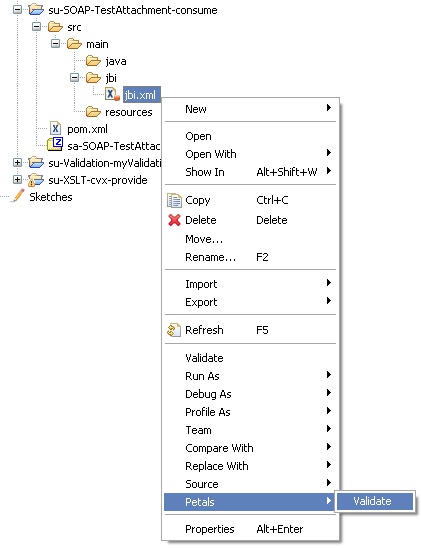
It is also possible to manually trigger the validation of a jbi.xml file.
Right-click it and select Petals > Validate.
The validation process results in a list (possibly empty) of errors and warnings that were found.
These errors and warnings are visible in the Problems view and as markers, which are added on the jbi.xml file.
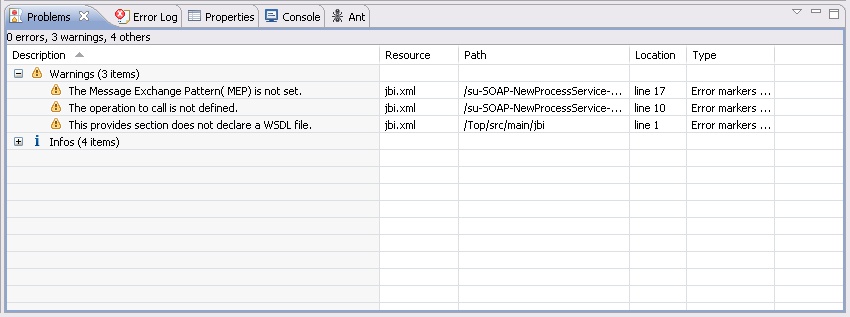
Errors markers are also visible in the source view and in the more complex user interfaces.