SummaryThis tutorial explains how you can make a Web Service visible inside Petals ESB.
|
Creating the Service-Unit project
Getting started
Start Petals Studio.
In the menu, select File > New > Petals Service Provider.
If you do not see it, go into File > New > Other... Then, select Petals Service Provider under the Petals category.
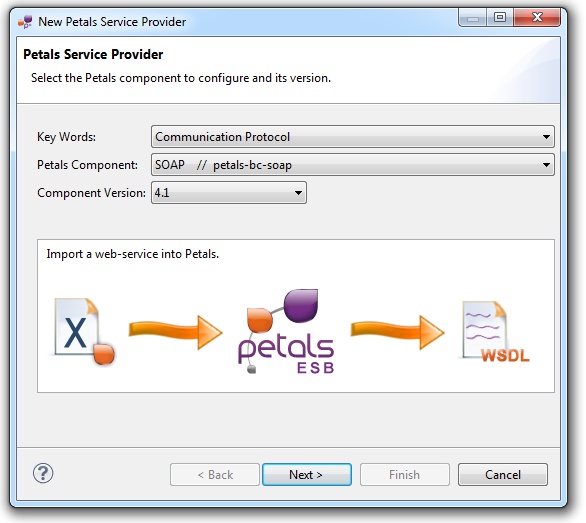
A wizard opens up, showing three drop-down lists.
In the Use Case list, select Communication.
In the Petals Component list, select SOAP // petals-bc-soap.
In the Component Version list, select the version of the Petals-BC-SOAP that you are using in Petals.
In the scope of this tutorial, we are going to work with the version 4.1 of the SOAP component.
Which gives us:
Click Next.
Identifying the service
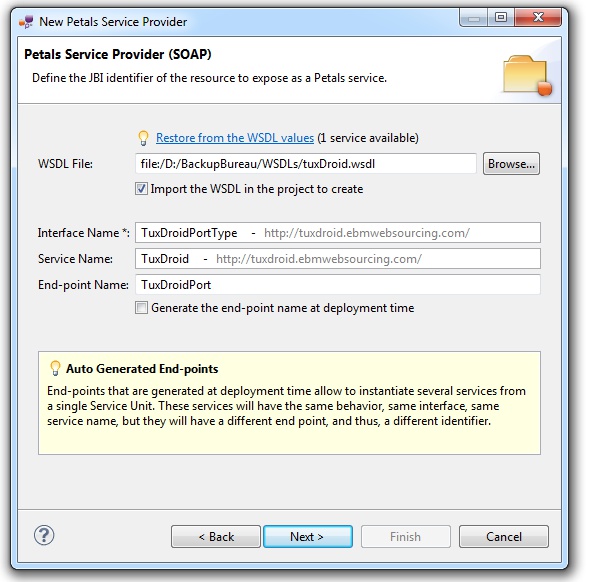
The current page requires you to fill-in the base information to put in the JBI descriptor (META-INF/jbi.xml).
In particular, it defines the interface, service and end-point names of the service that is imported.
When working with Web Services, these fields can generally be filled-in automatically, by providing a WSDL file.
If the WSDL interface is accessible through an URL, then copy its URL in the WSDL file field.
If you only have the Web Service address, the WSDL address can generally be found by appending "?wsdl" to the Web Service's address.
If the WSDL interface of the Web Service is located on the local disk, click Browse... and select your WSDL on the disk.
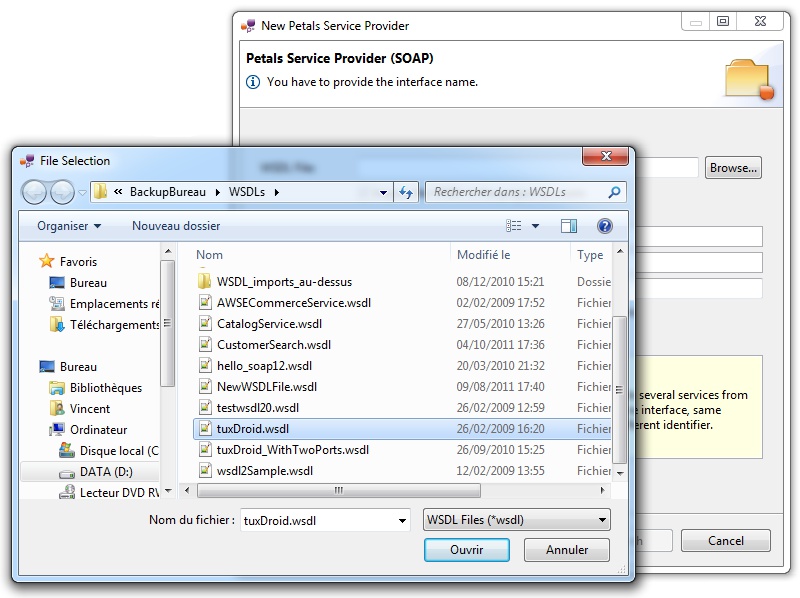
In any case, the other fields will be automatically filled-in.
If the WSDL interface describes several services, then all these services are available in the drop-down lists.
The service which is selected in the drop-down lists is the one that will be exposed inside Petals.
| The values for the interface, service and end-point names must match the WSDL interface. That is to say there must be a service with this name, implementing the so-called interface at this end-point. For the same reasons, filling-in the information by hand or modifying it is discouraged. Sticking to a WSDL interface always ensures this information is valid. |
| The auto-generation of the end-point means the service end-point is generated at deployment time. By deploying a such service-unit on n Petals nodes, you would have n times the same service, implementing the same interface, but available at n different locations. |
Once the WSDL location and the fields have been filled-in, click Next.
Defining the project name
This page defines the name and the location of the project that will be created.
Indeed, this wizard will result in the creation of a project containing all the required elements for a SOAP service-unit.
Enter a project name for your project.
If you do not want your project to be created in the default workspace, uncheck Use default location.
Then click Browse... and select the location where the project will be created.
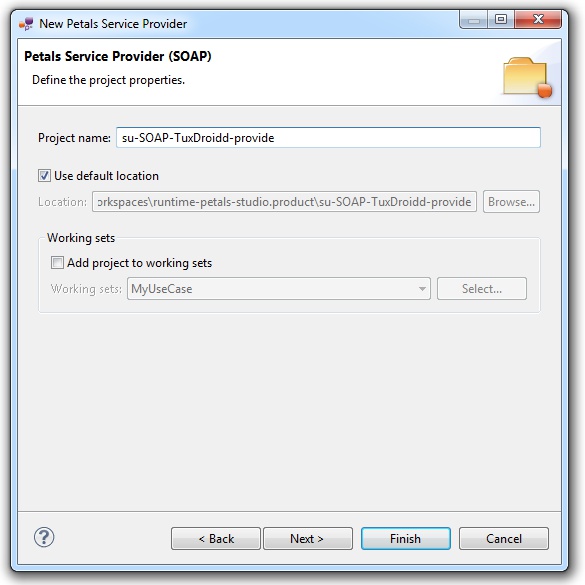
| Petals service-units have a naming convention. For a service-unit which provides a service, the convention is su-<Protocol or Technology>-<Service name>-provide |
Then, click Next.
Specifying the SOAP parameters
This page defines information which are specific to the Petals SOAP component.
Generally, you will not have to complete anything here (except if you are using a proxy).
The Web Service address and the SOAP version were retrieved during the WSDL parsing performed in the previous pages.
The meaning of all the parameters can be read in the documentation of the Petals-BC-SOAP component.
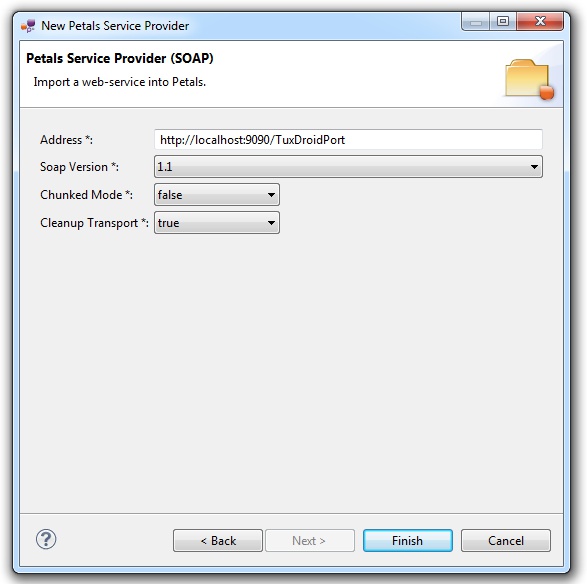
By default, you have nothing to do here.
Click Finish to complete the wizard.
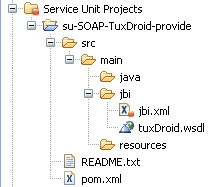
Checking the result
When the wizard has completed, a new project has been created and is visible in your workspace.
It contains a jbi.xml file, located under src/main/jbi.
This hierarchy allows you to work with Apache Maven then (a pom.xml was also created at the root of the project).
In the same directory, you can see your WSDL interface, which was imported with all its dependencies (e.g. referenced XML schemas or other WSDL interfaces).
Updating, packaging and deploying
Further edition and packaging
After completion, the newly created jbi.xml file has been open in the Service-Unit editor.
Regarding SOAP configurations, the wizards are complete and provide all the options.
Thus, you do not need to edit the jbi.xml.
The project contains everything the SOAP component needs.
You can now package it before deploying it.
The created project being a Service-Unit project, you can package it as any Service-Unit project.
It results in the creation of a Service Assembly for the Petals-BC-SOAP component. Its location depends on your export choices.
Deployment
The deployment of the created service assembly can be achieved with the Petals web console.
Or you can do it by dropping the service assembly in the install directory of your Petals installation.
This second option should only be used in development steps.
First, make sure the Petals-BC-SOAP is installed in your Petals environment.
Then, install the service assembly in your Petals, using one of the two ways indicated above.
There is no need to update configuration of the SOAP component to make it work.
Using the default settings is enough to make the service-unit work.